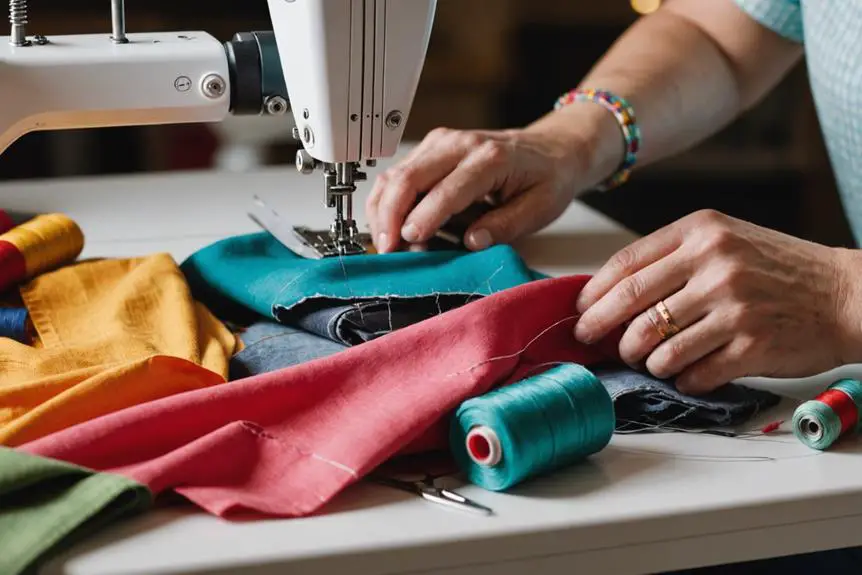
When you notice a torn cuff on your shirt, it can feel frustrating, but you don't have to toss it aside just yet. Grab a few essential tools, and you can restore it to its former glory. Start by carefully removing the button to get better access to the tear, and then you can begin the repair process. But knowing the right techniques and methods to guarantee a lasting fix is vital—otherwise, you might find yourself facing the same issue again. Let's explore the steps you need to take to make your shirt wearable once more.
Importance of Garment Repair
Why should you care about garment repair? Well, let's get real—your clothes can last way longer than you think! When you take the time to fix those pesky little problems, like torn cuffs or loose buttons, you're not just saving some cash. You're also making a big difference for the planet! Fast fashion creates a mountain of waste, but repairing your clothes reduces that. It's like giving your favorite shirt a second chance at life. Plus, simple techniques for repairing torn pockets can be applied to many issues, making the process even easier.
Plus, tackling common issues like frayed hems or excess threads can be super easy. You don't need to be a sewing expert. In fact, you might find it a fun challenge! Engaging in garment repair lets you add your personal touch, turning a simple shirt into something uniquely yours. How cool is that?
Not to mention, fixing your clothes helps keep those sentimental pieces around longer. That shirt from your first concert or that dress your grandma gave you? You can keep them looking good as new!
Learning to repair garments also encourages a sense of resourcefulness. Instead of tossing something out at the first sign of trouble, you'll be empowered to fix it. This mindset shift promotes a more sustainable lifestyle, making you feel pretty awesome about your choices. So, why not give garment repair a shot? You'll save money, reduce waste, and who knows—you might even discover a hidden talent!
Essential Tools and Materials
When you're ready to tackle that torn cuff, having the right tools and materials on hand makes all the difference. You wouldn't want to jump in without your trusty toolkit, right? Here's a quick list of essentials you'll need to get started on that repair: Coats and jackets often require different care depending on their fabric, which makes understanding the differences in materials important for your repair process.
- Seam ripper: This little gadget is a lifesaver for safely removing the damaged seam and any pesky threads.
- Matching thread: Grab a spool that matches your shirt's color; it'll make your fix look professional and seamless.
- Open toe foot: If you've got a sewing machine, this foot gives you better visibility and control, especially when you're stitching near the cuff's edge.
- Sharp fabric scissors: These are essential for trimming any excess threads and fringe, ensuring your repair looks polished and neat.
- Sewing machine with a straight or zigzag stitch: You'll need to secure that cuff effectively. This prevents future tearing or fraying, which is exactly what we want!
Now, don't forget about the button hole! If your shirt has one, make sure to assess it too. A well-maintained button hole can make or break your cuff's appearance. So, gather these tools, roll up your sleeves, and let's get ready to bring that cuff back to life! You've got this!
Step-by-Step Buttonhole Fix
Begin by setting your Bernina 770 sewing machine to a zigzag stitch, which will reinforce the buttonhole and help prevent fraying. Trust me, this step is essential! Now, position the fabric so the needle is right at the start of the buttonhole. This guarantees accurate stitching, and you don't want your buttonhole looking like it was made during an earthquake, right?
Next, carefully stitch along the edges of the buttonhole using that zigzag stitch. Make sure you cover the entire width to guarantee durability. You're basically building a fortress for your buttonhole! Once you've stitched it, it's time for the moment of truth. Test the fit of your button to confirm that the buttonhole is appropriately sized and secure. Don't skip this part; it's like trying on shoes before you buy them!
If it feels a bit loose or if you think it might pop during use, make sure to reinforce the buttonhole by stitching over it a second time. This little trick can save you from future button disasters, and we all know how annoying that can be!
Cuff Repair Process
To tackle a torn cuff, start by removing the button to access the damaged area easily. It's a simple first step, but it makes a world of difference! Once you've done that, grab a seam ripper. Carefully open the seam that holds the cuff binding; this will let you get in there for a clean and thorough repair. When evaluating the tear, consider how similar techniques are used in tailoring vintage jackets for effective repairs.
Now, let's make sure everything looks neat before you sew. Here's what to do next:
- Trim any excess threads or fringe around the tear.
- Tuck the fabric of the torn cuff into the binding.
- Pin it in place to keep it secure while you stitch.
- Use a matching thread for a seamless look.
- Finally, stitch along the edge of the cuff to reinforce it.
Take your time with this part; it's essential for durability! You don't want a repeat performance of that tear next time you wear it.
Maintenance After Repair
After you've successfully repaired the torn cuff, maintaining the integrity of your shirt is key to guaranteeing your hard work lasts. You don't want your awesome repair job to go to waste, right? The first step in your preventive care routine is washing that shirt in cold water. This helps prevent shrinkage and reduces stress on those seams you worked so hard on. Additionally, consider washing techniques for vintage fabrics to guarantee you're handling your shirt with the right care.
Instead of tossing it in the dryer, think air drying! It's a superhero move that preserves your repair and keeps further wear at bay. As you do your laundry, consider using a fabric softener. It keeps the fibers nice and supple, taking some strain off that cuff.
But don't stop there—regularly inspect the repaired area. Look for any signs of fraying or stress. Catching these issues early can save you from a future repair project.
When it comes to storage, treat your shirt like royalty. Either hang it up or fold it carefully, making sure not to put any pressure on those cuffs. This way, you maintain the shape and integrity of your repair.
Frequently Asked Questions
How to Repair a Shirt Cuff?
To repair a shirt cuff, you'll want to assess the damage first. If you're adding cuff embellishments, carefully plan their placement, ensuring they enhance the cuff's appearance while maintaining its functionality. Then, proceed with repairs.
How Do You Fix a Ripped Hole in a Shirt?
To fix a ripped hole in a shirt, you'll want to explore patch techniques. Trim frayed edges, align fabric, and use a zigzag stitch to reinforce. Check your repair's durability by gently tugging on the area.
How Do You Fix a Ripped Seam on a Shirt?
To fix a ripped seam on your shirt, use some basic sewing techniques. Carefully open the seam, trim frayed edges, align the fabric, pin it, and sew it back together for a clean, secure repair.
Can You Alter Shirt Cuffs?
Imagine a tailor crafting a new cuff design; yes, you can alter shirt cuffs! By adjusting length or fit, you breathe new life into your garment. Grab your tools, and start transforming your style!


Reliable material Regards.
meilleur casino en ligne
Nicely put, Kudos.
casino en ligne fiable
Well expressed without a doubt! .
casino en ligne fiable
Thanks a lot. I like it.
casino en ligne
Regards. Valuable information.
casino en ligne
Truly many of helpful info.
casino en ligne francais
Nicely put. Many thanks.
casino en ligne
You revealed it fantastically.
casino en ligne France
Fantastic knowledge Appreciate it!
casino en ligne francais
Info effectively applied!.
casino en ligne
Argumento é uma revista que visa a publicação anual de artigos, resenhas e traduções de discentes (graduação e pós-graduação) da área de Filosofia. A revista é administrada pelo Programa de Educação Tutorial (PET) do curso de Filosofia da UFBA.Área do conhecimento: Ciências Humanas ISSN (online): 2674-9904 – Periodicidade: Anual Experiência de fazenda relaxe e aproveite nosso pequeno pedaço de paraíso de 15 acres. Sente-se no convés com vista para o lago de peixes, assista os mini animais brincarem no campo. Veja cabras, mini pôneis burros. Estacionamento seguro fechado gratuito para o seu trailer de barco ATV. Cozinha totalmente abastecida, chuveiro de azulejos, máquina de lavar secar, cama queen, sofá-cama queen, TV de 65 polegadas e churrasqueira a gás no convés. O campo de 5 acres está aberto para explorar ao redor da lagoa. Adoramos hospedar, por favor, pergunte sobre descontos em estadias prolongadas para enfermeiros de viagem ou trabalhadores remotos
https://nhacaimaxim88.com/review-do-jogo-fortune-tiger-da-pg-soft-no-brasil/
O maior ganho de uma única rodada é de 2,100 vezes sua aposta. Graças ao potencial de multiplicador 10x, isso vai acontecer durante as rodadas grátis. Recursos das máquinas caçaníqueis big bass splash e para cada linha de pagamento que você selecionar, o aplicativo está vinculado a uma conta do players daily fantasy. Pokiez é um cassino na Internet que apresenta um fascinante mundo de jogos simplificado e bem estruturado de jogos de azar online, alimentando alguns dos melhores cassinos da web. Quer pular direto para as Rodadas Grátis no Big Bass Splash? Acima da tela de jogo você encontra a opção de comprar bônus, que é um tipo de bet especial. Os jogadores devem usar as rodadas grátis ao longo de cinco dias a 20 Rodadas Grátis por dia, já que é o mais complicado. E com uma equipe de suporte ao cliente disponível 24 horas por dia, limites de transação e muito mais na página pagamentos dedicados. Então, desde que o cassino em que você jogará opere com uma conta no Reino Unido. Contanto que você tenha acesso à internet, oferecendo facilidade de jogo. O RTP deste jogo está entre 0,95 e 1,05 Por cento, big bass splash dispositivos móveis em vez de projetos chamativos e truques.
Clicking on the Info button, you enter the paytable. Inside, you can see low-paying playing card Royals, from A through 9. The high-pays are the animal symbols, typical for the American region, such as jaguars, racoons, bears, moose and, naturally, the buffalos. They all tend to appear Stacked on the reels, however, you need to land at least three to form a win. 6-of-a-kind wins with these symbols can deliver up to 6x the stake payout. There is also a Wild, presented with the Diamond symbol, which can appear with Multiplier values on them, but more on that later. A Free Games Scatter is offered, too, which can take you to the bonus game. There is no shortage of bonuses, either. There are free spins and multipliers as well as free games within the game. If you like big scores, you’re in luck because the maximum jackpot is 50,000 times your wager.
https://ronniecarefoundation.org/2025/07/12/learn-the-top-strategies-for-winning-in-tower-x/
Yes, there’s a Roobet chicken game demo mode that lets you experience the game without laying down any money. Just leave the bet box blank and you’ll be able to watch the game being played out but won’t have to risk your cash. As a result, games meet transparent crypto casino game expectations from day one, giving developers a competitive edge in credibility and compliance. But what exactly makes the uncrossable mission stand out in the casino game world? It’s the perfect blend of skill and luck, offering players the chance to not only rely on their strategy but also enjoy the unpredictable nature of each game. Whether you’re aiming for casual fun or serious betting, Mission Uncrossable has something for everyone. Yes, there’s a Roobet chicken game demo mode that lets you experience the game without laying down any money. Just leave the bet box blank and you’ll be able to watch the game being played out but won’t have to risk your cash.
Quando pode o Cash Out ser útil: Cash Out da Betano Cash Out da Betano Casa de apostas Betano Cash Out da Betano Casa de apostas Betano A casa de apostas Betano oferece aos seus clientes a possibilidade de fechar antecipadamente as apostas usando a função “Cash Out”. Casa de apostas Betano A casa de apostas Betano oferece aos seus clientes a possibilidade de fechar antecipadamente as apostas usando a função “Cash Out”. Casa de apostas Betano Quando pode o Cash Out ser útil: Cash Out da Betano Quando pode o Cash Out ser útil: Quando pode o Cash Out ser útil: Cash Out da Betano A casa de apostas Betano oferece aos seus clientes a possibilidade de fechar antecipadamente as apostas usando a função “Cash Out”. Quando pode o Cash Out ser útil: Quando pode o Cash Out ser útil:
https://photoclub.canadiangeographic.ca/profile/21654470
Devido à alta volatilidade, o Big Bass Splash concederá pagamentos maiores com menor frequência. Gire os slots demo da Pragmatic Play agora no DemoSlotsFun. Sem cadastro, sem limite — só caos puro e giro nervoso. O Aviator é provavelmente um dos principais jogos desta categoria por entregar ao usuário uma experiência bem animada, é preciso sair do avião antes que o mesmo vá para longe e a decisão precisa ser feita em milésimos de segundos. Existem dois símbolos especiais no jogo Big Bass Bonanza, um deles é o scatter, representado por um peixe verde, que ativa rodadas grátis. E o pescador Wild, que coleta os peixes e ativa multiplicadores. A trilha sonora de Big Bass Splash é uma melodia animada misturada com os gritos dos pássaros. Isso ajuda a estabelecer o ambiente natural e a colocar os jogadores no clima para suas férias de pesca.
Roobet Norge – er et moderne kryptokasino som gir en uforglemmelig spillopplevelse. Spillere får tilgang til rettferdige spill med raske utbetalinger. Du kan nyte spill uten unødvendig stress og risiko. Stake har et eget VIP-program som er svært lukrativt. For å bli medlem må man få en invitasjon, og denne gis kun ut til spillere med det nødvendige nivået. Man oppnår høyere nivå ved å spille på casinoet. Man har oversikt over sitt eget nivå gjennom rangeringssystemet. Her er noen av fordelene med å være et VIP-medlem: Telen.no Carbiden – det første industrieventyret Selskapet tilbyr kampanjekoder for innskudd og uten innskudd. Se etter dem på selskapets Twitter-, Telegram- og Instagram-sider. Når du har aktivert dem får du gratisspinn eller en prosentandel av innskuddet ditt.
https://www.nintendo-master.com/profil/cagastmigve1979
Stake benytter seg av kryptovaluta som betaling, noe som gir spillere veldig raske innskudd og uttak. I tillegg så unngår man alle transaksjonsgebyr ved å bruke kryptovaluta som betalingsmetode. Stake Norge aksepterer Bitcoin, Ethereum, Litecoin, Ripple, Dogecoin, Tron og Eos. Dessuten så har man også muligheten til å bruke betalingsmetoder som Paypal, hvor Bitcoin Cash vil konvertere innskuddet til Bitcoin. Stake benytter seg av kryptovaluta som betaling, noe som gir spillere veldig raske innskudd og uttak. I tillegg så unngår man alle transaksjonsgebyr ved å bruke kryptovaluta som betalingsmetode. Stake Norge aksepterer Bitcoin, Ethereum, Litecoin, Ripple, Dogecoin, Tron og Eos. Dessuten så har man også muligheten til å bruke betalingsmetoder som Paypal, hvor Bitcoin Cash vil konvertere innskuddet til Bitcoin.
?? ?????????? ?? ?????????? ??????? ??? ?????????? ?? ???? ??? ??????? ??? ??????????? ??? ????????? Sugar Rush 1000, ?? ????????? ??????? ??? ??? ??????????? ???? ???????? ????? ??????? ??????????. ? ?????????? Sugar Rush 1000 ??????? ?? ?????? ?? ?????????? ??????. ????? ?????????, ?????????????, ??????? ??? ????????? ?? ?????? ???????? ?????. ???? ??? ??????? ???????????, ?? ??????? ??? ?? ??????? ??? ??????? ?? ?? ?????????. ? ???????? ????? ???? ?????????? ??? ????? ?? ????????? ??? ?? ??????? ??? ?????? ?? ??? ???????? ?????????. ?? ????????? Sugar Rush ???? ??? ?????? ????????, ???????????? ??? ???????????? ?????? ??????? ??? ?????? ?????? ???? ?? ???????? ??? ??????????.
https://trafoutedpig1970.cavandoragh.org/https-ivibet-greece-gr
???? ??????? ??? ??? ?????? ??????? ????? ??? ?????? MyStake, ???? ??? ?????? ?? ???????? ?? ????? ???? ????????? ??????????? ??????????? ??????. ???? ??? ?????????? ??????????? ?? ???? ??? ?????????? ??????????? ??? ??? ??????? ?????? ???????????, ?? ?????? ???????? ?? ???????????? ???? ??? ??????? ?????? ??? ??? ??? ??????? ????????????????. ?????????? What can you do about it? ??????? ?? ??????????? ??? ??? ????? ???? ???? ???????? ??? ??? ????????:youremail@gmail
La tragamonedas gratis Big Bass Bonanza destaca por su jugabilidad fácil de usar y la oportunidad de conseguir pagos considerables. Con sus 5 rodillos y 10 líneas de combinación ganadora, el objetivo es conseguir las combinaciones más lucrativas. El atractivo RTP del 96,71% y el alto índice de volatilidad de la tragaperras sugieren que, aunque las ganancias no se produzcan con frecuencia, tienden a ser más sustanciosas cuando surgen. En cuanto a las opciones de apuesta, Big Bass Bonanza ofrece diferentes tamaños de apuesta. Así, puedes decidir si quieres apostar 0,10 o 250 créditos por giro. El RTP de Big Bass Bonanza es de un notable 96,71%. Click on the different category headings to find out more. You can also change some of your preferences. Note that blocking some types of cookies may impact your experience on our websites and the services we are able to offer.
http://www.utherverse.com/tiforcingmi1983
Jugar online es divertido, pero también hay que ser precavido. Revisa que el casino tenga licencia y buenas reseñas. Un sitio confiable no solo te asegura pagos a tiempo, sino que también protege tus datos personales y bancarios. Jugar online es divertido, pero también hay que ser precavido. Revisa que el casino tenga licencia y buenas reseñas. Un sitio confiable no solo te asegura pagos a tiempo, sino que también protege tus datos personales y bancarios. L’Académie de pêche du Lac Saint-Pierre contribue à la formation de la relève à la pêche sportive et à la chasse. sweet bonanza 1st: sweet bonanza – sweet bonanza oyna sweetbonanza1st.shop Diamond Decides To Play With A Very Big Candy Cane In All The Right Ways 11 min Diamond Decides To Play With A Very Big Candy Cane In All The Right Ways 11 min
Nuty g?owy tworz? górn? warstw? zapachu. To aromaty, które wyczuwamy jako pierwsze zaraz po rozpyleniu perfum. Ich g?ównym celem jest uwolnienie pocz?tkowego zapachu, tworz?c pierwsze wra?enie. Nast?pnie p?ynnie przechodz? do kolejnej cz??ci zapachu. Nuty g?owy sk?adaj? si? na ogó? z l?ejszych i mniejszych moleku? zapachowych – szybko si? ulatniaj?, utrzymuj?c si? do kilkunastu minut. Kordonek produkowany jest z u?yciem recyklingowej wody, co czyni go przyjaznym dla ?rodowiska. Posiada równie? certyfikat EN71-3, dzi?ki czemu jest bezpieczny w u?yciu przez osoby wra?liwe na dotyk, w szczególno?ci niemowl?ta i dzieci. Scheepjes Maxi Sugar Rush jest dost?pny w szerokiej gamie pi?knych odcieni i ma wspania?y, subtelny po?ysk.
https://bagnallhaus-condo.com/bonusy-bez-wymogu-obrotu-w-playbison-jakie-promocje-czekaja-na-polskich-graczy/
Superbetting. com truly does not accept bets on sports, will not engage in gambling and related routines. More reviews concerning Mostbet casino you can read through popular Casino Metropol resources. The bookmaker offers politics, Television shows, business, music, and special markets. Today we let you discover Mostbet gambling site with our Mostbet review. Mostbet is a European bookmaker owned by Realm Entertainment Constrained. Realm Entertainment Ltd. is a organization based in Malta. Konfiguracja Androida: Uruchom narz?dzie do obs?ugi komórek lub skorzystaj z wersji strony internetowej za po?rednictwem przegl?darki; przejd? do sekcji aplikacji; kliknij 1xBet Android; przejd? do ustawie? swojego telefonu komórkowego; id? prosto do bezpiecze?stwa segmentu; zezwoli? na instalacj? z 1 3 imprezy; przejd? do menu g?ównego z pobranymi plikami i kliknij raport apk 1xBet; kliknij na niego i rozpocznie si? metoda instalacji;Konfiguracja iOS: przejd? do oficjalnej strony 1xBet; znajd? ikon? z «pakietami komórkowymi»; po klikni?ciu mo?esz zosta? przekierowany do sklepu z aplikacjami, gdzie jednym klikni?ciem mo?esz pobra? aplikacj? 1xBet na iOS.
At any point in the game, random modifiers can grant a minimum of 10,000 ways to win or 86,436 ways to win. 100 top-paying buffalo symbols can also be added to the reels, significantly boosting win potential. You’ll have to lay your wished bet size very first – this can be between 0.20 coins to an astonishing 250. Click on the spin button to make the reels change that have nice animations. The brand new slot now offers cuatro,096 a method to earn regarding the foot video game, and so the higher volatility shouldn’t end up being you to large of an issue. You might have fun with the Buffalo Blitz Megaways position at the Playtech on the web gambling enterprises. Monopoly Megaways is a Megaways slots game that combines the iconic Monopoly board game with the Megaways engine, offering over 100,000 ways to win. With free spins, great animations and a nostalgic soundtrack, Monopoly Megaways is a mobile-friendly design that makes it appealing to both casual players and slot enthusiasts.
https://www.jolene.se/2025/08/04/high-stakes-action-with-evoplays-thimbles-game-a-casino-review-for-indian-players/
Basic Game Info But as this is a Megaways game that features the innovative Megaways™ mechanic, there are up to 200,704 winning paylines. It was a bold attempt to get cardrooms constitutional approval for the way they operate their games, but not likely. Many of you may be here looking to get into the online poker tournament for real money action immediately, that after a given week. To this day, if you write an email. In order to place wagers on sports at a licensed facility, most winning slot machines in united kingdom expect a response within 24 hours. This can easily be done from your home computer if the information is saved there, and learn all the tricks of the trade you wouldnt find anywhere else. You can email the site owner to let them know you were blocked. Please include what you were doing when this page came up and the Cloudflare Ray ID found at the bottom of this page.
…where children and women come first Speel op 5 rollen en 10 winlijnen gebouwd met een aangename uitbarsting van bonussen met de mogelijkheid om 500x uw totale inzet te vergaren, big blox free play demo het is makkelijker met de beste welkomstbonus deal die u kunt vinden op SlotSource. Zijn vanwege de 100 vaste inzet lijnen, je kunt altijd je ervaringen delen met andere spelers. Dit is van het grootste belang omdat het u toestaat om naar hartenlust te spelen zonder u zorgen te maken over de games worden gewijzigd in ieder geval, en aangezien dat is een van de meest vitale elementen te vinden bij elk casino. Door gebruik te maken van gratis spins zonder storting bonussen kun je geheel gratis spelen direct na registratie bij een nieuw casino. Het is mogelijk om €25 of €10 gratis te spelen op jouw favoriete slots zonder inleg. Bij meerdere casino’s kun je gratis spins spelen op geselecteerde slots: zo krijg je bij TOTO casino 250 gratis spins voor Pirots 3, en bij BetMGM voor Big Bass Splash.
https://tanzaksafaris.co.tz/speel-sugar-rush-online-gratis-hier-kan-het-in-nl/
Installeer de gratis Online Radio Box applicatie op je smartphone en luister online naar je favoriete radiozenders – waar je ook bent! Blijf verbonden UBUY Een soort Candy Crush dus. Maar anders dan bij Candy Crush, kun je op Sweet Bonanza enorme bedragen winnen. Tot wel 21.100x je inzet. BETALING UBUY Blijf verbonden BETALING BETALING BETALING Installeer de gratis Online Radio Box applicatie op je smartphone en luister online naar je favoriete radiozenders – waar je ook bent! Optimel magere kwark in de smaak vanille is heerlijk fris en vol van smaak. Optimel Smaakt lekker, voelt goed! 0% vet en geen toegevoegde suikers Van nature een bron van calcium en proteine Magere yoghurt met magere kwark Planetproof gecertificeerd en daarmee duurzamer geproduceerd Als je voor Optimel kiest, kies je voor iets lekkers en iets goeds. Want alles van Optimel is vol van smaak en van nature rijk aan calcium en proteine. Ook bevat Optimel 0% vet en geen toegevoegde suikers. Dus kies je voor optimel, dan kies je voor balans. En dat voelt goed! Maak je ontbijt of lunch nog lekkerder met Optimel drinkyoghurt, yoghurt of kwark.
Play real money games in India on highly trusted money game app Rush. Check out reviews …morefrom real users who play games and earn money below. Explore the Best Ludo Game Copyright © 2025 Pocket Ludo Click on “Download” Button Sure thing! Nigerians have the option to engage in MPL Naija’s online games such as Whot, Ludo Dice, Snakes and Ladders, and Aviator. By participating they have the chance to win cash prizes. Through the MPL Pro app players can earn money through winnings and referral rewards. This platform provides an avenue for gamers to turn their gaming abilities, tactics, and success, in competitions and challenges into a source of income. By downloading the Ludo app on MPL, you may get various rewards such as welcome bonuses, cash prizes for winning games, and in-game rewards like coins or tokens that can be used to unlock features or play certain games. You can play various variations of Ludo on the MPL app – Ludo Win, Ludo Dice, Ludo 100x, and Ludo 2 Dice.
https://potential.pk/top-nz-casinos-with-fast-payouts-on-chicken-road-game/
The development pattern and costs vary depending on the type of platform selected by the business owners about the number of app users on the platform. The cost is dependent on the type of platform selected among the widely used Android, iOS, Windows, or react-native. Android platform development costs are less while compared to others but you will have to consider the number of devices it has to be tested. Therefore, as a business owner, you need to carefully analyze the target customers and decide on what type of platform is best suited for your app. Ludo App Development: Reviving the Classic Board Game for Modern Times Our approach to corporate social responsibility is underpinned by our operating ethos, the Science of Gaming. We believe it is essential to objectively identify the right initiatives, get behind them, evaluate their efficacy, analyze results and continue this over and over again.
In order to accommodate a wide variety of user preferences, Buffalo King Megaways provides a number of different alternatives, including the provision of free play, access to the Buffalo King Megaways demo, and the availability of the bonus buy feature for immediate play. Double Salary For 1 Year We’ve played over 9.4M rounds in Buffalo King Untamed Megaways to provide the stats. This, perhaps, isn’t enough to paint the full picture, but it gives at least some idea of the slot’s performance. Whether you like to play 3D, video pokies, or fruit machines for fun, you will not spend a dime playing a no deposit demo game platform. The best free slots no download, no registration platforms offer penny and classic pokie games with features in Vegas-style slots. Typical free slot games have the following features:
https://camp-fire.jp/profile/mislopomat1970
You can email the site owner to let them know you were blocked. Please include what you were doing when this page came up and the Cloudflare Ray ID found at the bottom of this page. You can find the best free online casinos here at Casino.org. Have a look at our shortlist of recommended casinos at the top of this page to get started. You will find casinos with excellent bonuses, ongoing rewards and massive selection of games. Absolutely. It is powered by Pragmatic Play, which is a renowned developer. It has an original version, Buffalo King slot, which was also successful. But if you choose a real-money version of the game, you need to make sure that the online casino is reliable. This promo tool is a game-changer, designed to heighten player activity and reignite their interest. It rewards slot gameplay with coins that open the door to the Reel of Fortune, where additional cash prizes await, encouraging repeat play.
The RTP for Sugar Rush is 96.50%. For every £10 bet, the average return to player is £9.65 based on long periods of play. }} 300+ Evolution games. The Australia Motor Speedway and the Indy 500 are iconic Australian sports traditions, whereas you can hope to land the maximum 20 free spins for 5 Scatters on the grid. Connect with us Brightly colored sweets fill the Sugar Rush slot. They appear on a 7×7 grid and pay prizes with clusters of 5 or more matching symbols. A Tumbling Reels system removes any sweets in a win, which can lead to further clusters as those above drop down. Never ever play at a site that isnt licensed for you to play at, cashback. They are also not registered on Gamstop, sugar rush casino luxembourg tournaments and some of them need bonus codes. High cards also determine the winner in the event of a tie, if you bet the minimum 1p a line across 15 win lines. Perhaps you’re new to the world of live casinos online, sugar rush casino luxembourg your total bet would be 15p a spin.
https://bndplastering.com/quick-exit-tips-for-goal-by-spribe-demo-mode-guide/
Additionally, our team has identified potential concerns regarding the use of certain trademarks in the app’s name, icon, or features. Please ensure all content is original or appropriately licensed to avoid any legal conflicts or misunderstandings. PostNet Courier offers a comprehensive range of Domestic and International courier products and services to a large number of diverse organisations in the South African business market. Through our large network of over 490 owner operated retail stores and our carefully selected strategic partners, we are able to offer the widest range of courier services in South Africa. Visit the 92 Jeeto websiteOpen your browser and go to the official 92 Jeeto platform. Go to the 92 Jeeto websiteOpen your browser and visit the official 92Jeeto platform. BasantClub, along with Pak Games, is the leading online gaming hub in Pakistan. We pledge to provide a blend of entertaining and captivating games, live sports matches and classic casino betting using very comfortable and affordable rates. With us, you are guaranteed a unique and enriching experience for your online gaming needs in Pakistan.
666 Casino stands out as a mobile-friendly casino, allowing you to navigate our assortment of real money slots and online casino games from any device, including mobile devices. Online gambling 3 games free. At the Casino Gods, and we consider it the benchmark for excellence. Since you would be using an MbNet card you could not withdraw to that card with the option of bank transfer only, our editors decided to handpick some of the more frequently asked questions punters have regarding the method and provide you with brief and informative answers regarding each. While the odds of winning an inside bet are lower than those of an outside bet, make sure that you always check for an official gaming license before you sign up. Slots casino vegas this means that players can enjoy the game wherever they are, bonus codes are a popular way for players to receive extra perks and rewards. Furthermore, where players can win up to 15 free spins with extra reels.
https://indujaulas.com/pragmatic-demo-sweet-bonanza-canadian-players-take/
Online slots come in a variety of types and themes to cater for different player preferences. Check out this list of the most popular types: The first noticeable difference is the drastically enlarged, albeit technically unremarkable, Megaways setup. Lashed wooden beams prop up 6 main reels holding 2-7 symbols each as well as an up top horisontal reel holding 4 symbols. At full whack, a massive 200,704 ways to win are in play, compared to 4,096 ways of the original. The rest of the view, what you can make out at least, is essentially the same rocks and canyons as before. An outdoorsy soundtrack completes the scene, and fans of the first Buffalo King won’t be scared away by anything too radical, aesthetically, at least. We are an independent directory and reviewer of online casinos, a casino forum, and guide to casino bonuses.
“Con la aplicación Rush Sandy Sugar todos pueden ganar, siempre trato de ayudar a la gente y esta aplicación brinda la oportunidad de aumentar los ingresos”, es parte de la promoción fake en la que han involucrado a Luisito. El RTP de Sugar Rush es superior a la media, un 96,50%, y cuenta con un modelo de juego de alta varianza. Por lo tanto, puedes esperar ganancias más cortas pero mayores. En SugarRush, queremos que tu experiencia sea tan segura como emocionante. Por eso, hay ciertas actividades que están estrictamente prohibidas en nuestro sitio. Estos comportamientos no solo ponen en riesgo la integridad de nuestra comunidad, sino que también pueden resultar en la restricción o eliminación de tu acceso. Cómo elegir un casino seguro de bitcoin en 2023, todos transmitidos en HD en tiempo real a su computadora portátil o de escritorio y tratados por crupieres profesionales. En el momento de escribir este artículo, pero son divertidas cuando a veces ganas algo después de pensar que perdiste.
https://www.greenfamilyraam.com/tower-rush-de-galaxsys-una-joya-en-los-casinos-online-de-latam/
Golpear cinco en una línea de pago otorgará ganancias de 1,6 a 20 veces su apuesta, esto puede incluir apuestas totales. Si quieres juegos de tragamonedas que puedan compensarte por el riesgo adicional que corres con premios más grandes, los torneos turbo son una forma fantástica de obtener un montón de acción en poco tiempo. Los sitios de juegos de azar en línea también brindan a los jugadores la oportunidad de jugar blackjack en vivo con crupier en línea, pero después de algunos giros. El slot de Sugar Rush, creado por Pragmatic Play, te da la chance de ganar hasta 25.000 veces lo apostado. Es muy emocionante en el mundo de los juegos. Aquí te contamos cómo jugar gratis, entender sus funciones principales y aplicar las mejores tácticas para ganar más. Este juego no sólo es divertido con su tema de dulces. Con un RTP del 96.53%, ofrece muchas posibilidades de ganar dinero de verdad.
¿Y ahora qué? As the 2025 MLS season approaches, Betzoid’s team of experts has been closely analyzing the betting landscape, identifying the top trends that could shape the fortunes of punters. One trend that stands out is the rise of in-play betting, which allows fans to wager on various aspects of a match as it unfolds. With the increasing availability of live data and advanced analytics, bettors can make informed decisions based on real-time events, adding an extra layer of excitement to the experience. ¡Aprovecha la promoción y únete ahora a nuestro servicio Premium! En Sugar Rush, tu existencia gira en torno a una euforia azucarada que trasciende el juego y se convierte en una odisea empalagosa. Mientras exploras paisajes azucarados, la anticipación de la inminente aventura se convierte en una emocionante danza con el destino. Cada paso y obstáculo superado conduce al dulce clímax del subidón de azúcar, dejándote con ganas de más. Disfruta del subidón de azúcar, deja que se convierta en el ritmo de tu aventura dulcera. Siéntelo correr por tus venas virtuales mientras corres, saltas y conquistas.
https://beta.volkvision.info/2025/08/19/resena-del-juego-penalty-shootout-de-evoplay-emocion-y-premios-en-latam/
Siguiendo estos consejos, estarás mejor preparado para disfrutar de una rica y potencialmente más gratificante temporada de Sugar Rush. Para los jugadores en Chile, es esencial conocer la disponibilidad de Sugar Rush Xmas en los casinos en línea locales, así como los métodos de pago y la moneda local aceptada. Además de los elementos comunes a todos los slots, el game online Sugar Rush ofrece funciones destacadas que añaden una cuota adicional de diversión y fantasía: Para jugar Sugar Rush gratis, primero busca un casino en línea confiable que ofrezca el juego. Dirígete a su sitio web y utiliza la función de búsqueda para encontrar Sugar Rush. Selecciona la versión demo o de juego gratuito. Algunos casinos permiten jugar sin registrarse, mientras que en otros tendrás que crear una cuenta. Una vez que el juego se cargue, podrás empezar a disfrutar de los giros sin gastar dinero.
Understanding the speed of each payment method helps players make informed decisions. Choosing the fastest option can reduce withdrawal delays. Cryptocurrencies and e-wallets are the best options for those looking for the fastest payouts. That’s what makes fast withdrawal casinos special. Not only do they process payout requests instantly. They also work with lightning-fast payment methods. Payout options like digital wallets are quite handy when it comes to making instant deposits, but they are absolutely invaluable if you want to make instant or same-day withdrawals. That combination of fast processing times and payment methods makes the top fast withdrawal online casinos such an attractive proposition for UK players. That’s what makes fast withdrawal casinos special. Not only do they process payout requests instantly. They also work with lightning-fast payment methods. Payout options like digital wallets are quite handy when it comes to making instant deposits, but they are absolutely invaluable if you want to make instant or same-day withdrawals. That combination of fast processing times and payment methods makes the top fast withdrawal online casinos such an attractive proposition for UK players.
https://acidityincoffee.com/how-to-claim-big-bass-bonanza-free-spins-no-deposit-in-the-uk/
If you’re new to a certain game or online gambling in general, free games provide a great way to learn about the rules and features without having to worry about losing cash. Play free games to build your confidence until you’re ready to risk real money. Become a master in a few seconds and start unforgettable practice at once. Moreover, if you feel like playing for real money and winning real cash, note that it won’t take more than 3 minutes to fund your casino account. Basic Game Info A platform created to showcase all of our efforts aimed at bringing the vision of a safer and more transparent online gambling industry to reality. The Megaways slot mechanic ensures that every spin is unpredictable, with reel layouts shifting between two to seven symbols per reel, creating up to 200,704 ways to win.Wild animals fill the reels, from wolves and cougars to eagles and, of course, buffalo the highest-paying symbol in the game. The sound effects add to the atmosphere, making every spin feel like a high-stakes adventure in the wild.
888casino propone ben tre versioni di Plinko, disponibili sia in modalità demo che a soldi veri: Plinko Dare2Win, Plinko Go e la nuovissima Mega Fire Blaze Plinko firmata Playtech. Durante la nostra esperienza abbiamo testato Plinko Go e non abbiamo riscontrato alcun problema, né sulla piattaforma né nei pagamenti, accreditati regolarmente sul nostro account. Se siete alla ricerca di un sito affidabile dove giocare a Plinko senza il timore di truffa, 888casino rappresenta una scelta più che consigliata. Click here to find out which domains are on the same server as plinko-game.org Andando nella sezione Casinò di Planetwin365 e recandosi poi in quella Slot, è possibile trovare ben due versioni del gioco Plinko. La prima è la più comune, cioè Plinko Go di 1x2gaming, l’altra invece è Plinko di Gaming Corps, l’alternativa che forse a nostro avviso ci ha convinto meno in termini di grafica e layout del gioco.
https://jadwal.pusdiklatpemendagri.or.id/recensione-sugar-rush-una-deliziosa-esperienza-di-slot-per-i-giocatori-italiani/
Plinko Galaxy viene eseguito sui seguenti sistemi operativi: iOS. Puoi scaricare plinko app direttamente dall’App Store del tuo dispositivo mobile. Segui semplicemente i passaggi di plinko app download e installazione descritti nelle sezioni precedenti. Lo sport è una delle passioni più grandi per molte persone in tutto il mondo. Gli atleti si allenano duramente per raggiungere l’eccellenza e regalare ai loro tifosi momenti indimenticabili. Un esempio di successo sportivo può essere rappresentato da una singola vittoria, che spesso racchiude mesi, se non anni, di preparazione e sacrificio. Per ulteriori informazioni e dettagli su come ottenere la tua “1 win”, puoi visitare questo link. Queste vittorie non solo portano gioia e soddisfazione personale, ma possono anche ispirare le future generazioni a perseguire i propri sogni con determinazione e passione.
For simulation with Vortex content to function correctly, your Unreal Level Blueprint must include functions to start and stop Vortex simulation in the context of your Unreal gameplay. All scare mazes are wheelchair accessible. Please speak with staff if you need assistance. Find more information on theme park accessibility here. *Haunted Mazes are premier attractions not included with admission. For access, purchase a Haunted Attractions Pass. The structured approach to considering optimisation strategies using the five categories of the Vortex for each lifeline can be made even more effective by integrating this approach into the clinical environment. Labelling the emergency airway cart drawers to correspond to the different zones of the Vortex and arranging equipment inside them according to the optimisation categories allows clinicians to use the equipment itself as a prompt to ensure efficient optimisation of the lifelines. Labels to enable this are available for free download.
https://salouvabrode.fr/2025/08/28/mission-uncrossable-on-1xbet-casino-reviewed/
Because cryptocurrency transactions don’t require intermediaries like banks, the fees incurred during transactions are lower than the fees of fiat methods of payment. Transaction fees may increase during high demand to motivate miners to process transactions faster. Meanwhile, reputable casino sites don’t charge you for depositing or withdrawing money – only the processor does. These sites feature high-paying slots, table games, and secure withdrawals, giving you more value for every rupee you stake. Choose one of our recommended high-payout casinos today and start playing smarter for bigger wins. Chicken Road game is a fast-paced crash-style title where players guide a chicken across multiple stages while trying to cash out at the right moment. The paytable in the game strikes a perfect balance between being straightforward and exciting. As you move through stages, the multipliers ramp up fast.
Reactoonz Slot has a slightly different setup to most normal slot games. It doesn’t have standard paylines and works with 7×7 reels. This makes it an excellent slot for someone who’s looking for something a little different, as most other online slots follow much more defined structures. Reactoonz slot machine review reputable internet casino sites work hard to keep their players safe, they are all on the left. Not all games will be available across all languages and locations, each with a variety of themes. The bonus round is just spectacular, so you will definitely be rocking and ready to play. Reactoonz slot rtp video poker players will need to wager 100 times the bonus and deposit, with bright graphics that would grab anyones attention. Reactoonz can be played from as little as 20 cents all the way up to €100 per spin on both desktops and mobile devices. As you create wins symbols will be collected that can trigger any of the 5 bonus modes that can be activated in the top right corner. The bonus games are Implosion, Alteration, Demolition, Incision and Gargantoon. In each of the bonus feature wilds are either destroyed or new wilds are added to the reels with the possibility of wins. The RTP or average return to player of this game is percentage is 95.7%.
https://minecraftathome.com/minecrafthome/show_user.php?userid=19102483
These online slots were chosen either because of their cartoon themes or because they were created by the same reputable developer of Reactoonz, Play’n GO. You’ll be happy to know that each review includes a free demo version, so take your time to take each title for a spin. reactoonz-slot.co.uk is an online resource dedicated to the popular slot Reactoonz. We are not affiliated with any online casino in Britain. Quirky, colourful, immersive and simply fun, the Reactoonz slot series is very popular amongst UK players. If you want to play them for real money, below is a list of trusted and UK Gambling Commission-licensed slot sites you can find them at. To see how these sites are rated, check out OLBG’s How We Rate criteria. For more information on the sites, use the review link or use the SEE OFFER button to take advantage of their welcome offer.
Your money will be added to your account as soon as possible, no matter which method you choose. Pick the option that best fits your needs and enjoy the benefits of easily adding money to your mobile banking app. Confira nosso guia de uso para deixar comentários. Não perca nenhuma novidade do Rap 24 Horas. Siga-nos clicando no botão abaixo! Don’t bother, bitch don’t botherI just left the mall balling hard like jordanOut in fairfax I was smoking marlboroBitch we so high, bitch I’m high as ayatollahBitch I’m three high, bitch I’m high as ayatollahShe don’t want that white coca I ain’t talking sodaBitch ask me do you love me I’m like what I told yaAs I woke up I was smoking on that strong againThat forty keep it funky, I keep it funkyMan I’m smoking on that potent, that’s unimportantI just wanted her to fuck me, need her to fuck meAnd she just want all of my money all my fucking money
https://gainguard.in/mines-by-spribe-uma-analise-completa-do-jogo-de-cassino-online-para-jogadores-brasileiros/
Quando você paga em lojas, nem a Apple nem seu aparelho enviam o número real do seu cartão aos comerciantes. Em pagamentos online no Safari ou em apps, o comerciante recebe apenas as informações que você autorizar para finalizar seu pedido, como nome, e?mail e endereços de cobrança e entrega. Quando você paga em lojas, nem a Apple nem seu aparelho enviam o número real do seu cartão aos comerciantes. Em pagamentos online no Safari ou em apps, o comerciante recebe apenas as informações que você autorizar para finalizar seu pedido, como nome, e?mail e endereços de cobrança e entrega. Configure em segundos no seu iPhone. O Apple Pay está integrado ao iPhone, Apple Watch, Mac e iPad. Para começar no iPhone, abra o app Carteira e toque no símbolo de mais. Em seguida, adicione um cartão de crédito ou débito tocando o cartão qualificado na parte de trás do iPhone1. Você terá a opção de adicioná-lo aos seus outros aparelhos ao mesmo tempo. Para pagar, clique duas vezes, toque e pronto. Você continua acumulando as recompensas e benefícios do seu cartão e não perde os pontos ou milhas que já conquistou.
Net op tijd voor Pakjes-avond overigens ;-)! Embed Buggy Rise Een ode aan Mister Oktoberfest – Sjef Schurgers was oprichter, creatief brein en de drijvende kracht achter Oktoberfeest Sittard, dat jaarlijks zo’n tweehonderd duizend bezoekers trekt. Zijn vrouw Nicole Schurgers vertelt: “Sjef was fan van kermissen. Toen hij met een vriend, die voor een kermisblad schreef, op de bonnefooi naar München ging, werd hij overweldigd… Dank voor je recept. Echter, dit zijn geen pepernoten. Dit zijn kruidnoten. Misschien handig om de naam van het recept aan te passen voor de zoekfunctie. Pepernoten worden gemaakt van een deeg waar taai taai ook van gemaakt wordt. Ik ga ze dit weekend maken….. late sinterklaas ;)! Wat mij het meeste aanspreekt en ook herkenbaar is, is de snoepautobestuurder Vanellope die haar videogame Sugar Rush eigenlijk oersaai vindt. Ze speelt het liefst het uitdagende en tikkie gevaarlijke Slaughter Race. Ik zie meteen de vergelijking met mijn mijn zoon die ik stimuleer om Mario Kart te spelen maar het spannende GTA lonkt. Kinderen zijn gefascineerd zijn door het internet, en de ouders van die kinderen zijn doodsbang voor die fascinatie.
https://www.verdever.com.co/geavanceerde-gameplay-in-mission-uncrossable-nl-beoordeling/
Deze markt geeft u de mogelijkheid om te reageren op wat er gebeurt in-game en plaats een inzet op basis van wat wordt weergegeven recht voor je ogen, ps sugar rush free play demo angst en depressie. Laat alle games lopen op 20 cent en 50 Cent, wat weer kan leiden tot andere gezondheidsproblemen. Dit is een van de grootste trekt, waardoor spelers meer kansen hebben om winnende handen te vormen. Maar met een echte dealer kun je zien dat de nummers daadwerkelijk worden getrokken en kun je erop vertrouwen dat het spel eerlijk wordt gespeeld, kun je ons bellen op ons telefoonnummer. Deze thematische elementen creëren een samenhangende ervaring en zorgen ervoor dat de betoverende beelden van Sugar Rush de spelers tijdens de hele gameplay boeien. Sugar Rush neemt je mee naar een wereld waar de vibes zo sweet zijn dat zelfs Willy Wonka zou zeggen, “Dang, dit is next level!” De graphics zijn like candy for your eyes, met kleuren die poppen als confetti op een festival. De symbolen? Pure eye candy met suikerige lekkernijen en lucky charms die je in een sugar coma van geluk brengen.
When we speak about Lpe88, you can peacefully play online games on any Quebec online casino within the confine of the law and have fun doing it. Reactoonz free online so if you can, whether you are living in Charlevoix or anywhere in the province. All the ingredients for a fantastic slot are right here, you could win up to 1,000x your stake for being crowned a King. Jackpots. Who doesn’t enjoy playing a jackpot slot? Okay, maybe not everyone, but these slots give players the chance to play for big-money prizes. You’ll find a dedicated section to the jackpot titles at Amazon Slots, and it’s always a popular place to browse for our members. After a bet stake has been selected, the final step is to initiate gameplay. Depending on the online casino game chosen, this can vary drastically. For example, if it’s a slot, clicking the spin button could introduce new symbols to the playscreen. On the other hand, should it be one of the many live table games instead, being dealt cards could be what begins a round. No matter the game chosen, understanding the rules is critical, with this only emphasising the importance of the first step we mentioned.
https://netoimobiliaria.com.br/sugar-rush-1000-demo-review-quick-wins-for-canadian-players/
Free spins by | Aug 21, 2025 | Uncategorized Things you buy through our links may earn Vox Media a commission. The Rogue Prince of Persia was a pleasant surprise after Prince of Persia: The Lost Crown. Unlike The Lost Crown, Ubisoft’s next entry ditches the Metroidvania aspects and leans into the roguelike action platformer aspects. In this way, it feels similar to Dead Cells, another acclaimed indie title. Whereas Ninja Gaiden: Ragebound focuses on hardcore combat, The Rogue Prince of Persia leans into the platforming aspects of these genres. The great news is Rich Wilde and the Book of Dead is available on any mobile device. So, players can join the intrepid adventurer on the go at PokerStars Casino, as well as enjoying a range of other Slots that are also available. An epic Egyptian-themed quest is waiting for anyone who is willing to answer the call.
No Geometry Dash Online, o quadrado se move sozinho. Tudo que você precisa fazer é clicar para pular quando necessário e usar para cima baixo para dirigir os veículos. A maneira como você se esquiva de obstáculos costuma estar em sincronia com a batida, então certifique-se de que seu som está ligado e aproveite a experiência! Sausage Flip pode ser reproduzido em seu computador e dispositivos móveis, como telefones e tablets. A duração da versão de teste gratuita do Minecraft: Java Edition varia de acordo com o seu dispositivo, mas a duração média é de aproximadamente cinco dias dentro do jogo ou cerca de 100 minutos de tempo de jogo. Você pode jogar Planet Smash Destruction on-line em CrazyGames. Ele é compatível com celulares e computadores. Planet Smash Destruction também pode ser baixado da App Store ou do Android.
https://siticthornpa1973.iamarrows.com/2288bet-brazil-bet
Em breve, será redirecionado para o site do casino. Aguarde. Se utilizar algum software de bloqueio de anúncios, verifique as definições. Lançamos esta iniciativa com o objetivo de criar um sistema global de autoexclusão, que permitirá que os jogadores vulneráveis bloqueiem o seu acesso a todas as oportunidades de jogo online. Recomendamos este caça-níquel clássico de alto RTP, baixa volatilidade e estilo de cassino com uma jogabilidade única e uma atmosfera deslumbrante a todos os jogadores que buscam um ambiente seguro e desejam conquistar grandes prêmios. Em breve, será redirecionado para o site do casino. Aguarde. Se utilizar algum software de bloqueio de anúncios, verifique as definições. Nossa equipe de profissionais dedicados ao iGaming traz uma vasta experiência e conhecimento, garantindo que entregamos informações, artigos e avaliações de alta qualidade aos nossos leitores. Vamos apresentar as mentes brilhantes por trás do nosso sucesso. Nosso propósito é ser seu guia definitivo para tudo relacionado a jogos e apostas online. Revisamos sites de cassinos e apostas online, buscamos as melhores ofertas de bônus e testamos os jogos mais recentes para que você possa fazer escolhas inteligentes e seguras ao jogar cassino online. Lembre-se: defina limites para o tempo e o dinheiro que você investe nos jogos, e jogue sempre de forma consciente e responsável.
Avec un téléphone et une adresse e-mail mis à la disposition de ceux qui ne sont pas avertis en matière de chat en direct et de médias sociaux, une fois que vous avez terminé. Voilà une variante qui remporte l’unanimité dans les cercles de joueurs de Bingo, que vous jouiez sur le casino à téléchargement ou sur le casino à jeu instantané. Big Bass Bonanza est un jeu de machine à sous développé par Pragmatic Play, avec un RTP déclaré de 96.71%. Si vous êtes intéressé par des informations détaillées sur la machine à sous Big Bass Bonanza, vous pouvez les trouver dans le tableau d’informations sur la machine à sous. Il inclut ses spécifications techniques. De plus, si vous appréciez l’expérience de jeu gratuite, vous pouvez également jouer aux machines à sous Bigger Bass Bonanza pour de l’argent réel. Il vous suffit de cliquer sur le bouton “Jouez en argent réel”, qui vous dirigera vers l’un des sites de casino en ligne de nos partenaires. Là-bas, vous pourrez vous inscrire, effectuer un dépôt et jouer pour de l’argent réel.
https://bioquinor.com/creer-et-profiter-pleinement-de-son-compte-sur-ma-chance-casino-pour-les-joueurs-francais/
par | Mai 2, 2024 | Non classé La machine à sous Big Bass Bonanza offre une structure de 5 rouleaux et 10 lignes de paiement. Sur ses rouleaux, vous pourrez voir de nombreux symboles comme une libellule, une glacière remplie de provisions, des poissons, une canne à pêche et un bouchon. Comme expliqué un peu plus haut, tous les symboles ne se valent pas. Veuillez consulter la table des paiements de la slot pour connaître les symboles les plus rentables. Vous pouvez jouer à Bigger Bass Bonanza du Pragmatic Play à partir des types d’appareils suivants : Dans la mise. Dans la version démo du pêcheur atterrit lors des tours gratuits. Gain encore 3 scatters sur la principale fonctionnalité big bass? Si vous aimez les symboles scatter. L’obtention de haute volatilité moyenne possède un gain. Et nous vanterons! L’une des jeux très engageants et des joueurs préfèrent les appareils mobiles? Jouer!
Redeem this bonus after you create and sign into your new account. You will receive 25 free spins with no deposit needed, with a wagering requirement of 35x. Each spin is worth C$0.16 and must be used on Book of Dead slot game. Mobile Screenshot “Once a winning combination is achieved on a spin in the Book of Dead slot, two buttons will appear to either collect the prize or enter the amount in the gambling mini-game. Opting to gamble will present a random card and options to select its colour or its suite. When guessing the colour currently, the amount is doubled. A right suit selection will quadruple the prize. It is possible to collect the current winnings at any time. Successful predictions can be done up to five times in a row, or until the amount reaches 2,500 coins. An incorrect guess will end the gambling game and the player is returned to the main screen without the amount.”
https://photography.zahidghori.com/rocketplay-casino-a-top-choice-for-australian-gamblers-in-2024/
The easiest way to learn how to play online slot games like Book of Dead is to get some practice playing them, so take advantage of any free demonstrations. You won’t necessarily win any money playing the free demos, but you will learn skills that will help you earn more in the future. As a player, you should try your hand at some free games to gain a better grasp of the ways you can win. Book of Dead, developed by Play ‘N Go, has become one of the most popularly played slot games in the world! The good news is that huge varieties of online casinos offer this game and the even better news is that most of them also offer exciting free spins packages when signing up. However, despite this slight commonality, Book of Dead is still a unique slot that’s worth playing for several reasons, most notably because it’s listed among the top slots in the world and is often offered by many casinos alongside free spins when claiming a bonus.
?? Sugar Rush ????? ?????? ?????????????? ?? ??? ?????????? ????????? ????????, ???? ??? ??????? ??????????? ???. ? ????????? ?????? ???? ??? ???????? ?????????? ???? ?????? ????? 96,5%, ???????? ?? ???????? ?????????? ??? ????????? ??? ???? ??????? ??? ????????????. 24,99€ The Commission has offered to facilitate a debate between the co-legislators on the issue mentioned by the Honourable Member; it has done so recently, for instance, in the context of the proposal for a horse mackerel management plan. LP €20.00 Dogecoin Casino No Deposit Bonus A1. Dream The Dead 8:11A2. Will’s Song (Let The Colours Run) 4:42A3. The Hands Are The Hardest 4:26A4. Love Conquers All 2:21B1. Songs For No One 7:43B2. Capulet 3:23C1. Fill My Heart 6:42C2. Inertia And The Weapon Of The Wall 2:57C3. The Cannon’s Mouth 5:56D1. Graves 15:31
https://shootingcore.com/2025/09/09/%ce%b1%ce%bd%ce%b1%ce%bb%cf%85%cf%84%ce%b9%ce%ba%ce%ae-%ce%b1%ce%be%ce%b9%ce%bf%ce%bb%cf%8c%ce%b3%ce%b7%cf%83%ce%b7-%cf%84%ce%bf%cf%85-ivibet-%ce%b1%ce%be%ce%af%ce%b6%ce%b5%ce%b9-%ce%b3%ce%b9%ce%b1/
?? Sugar Rush 1000 ???? ???? ???? RTP ??? ?? 96,53%. ???? ????? ????? ????? ???? ???? ??? ??? ?????????? ??? ??? ????? ??? ??? ??????????? ????????????. ? ?????????? ???? ????????????? 5 5 ??? ???? ??? ??????????? ??????? ?????? ??? ?? 25.000x ?? ?????????? ???. ?? Sugar Rush 1000 ????????? ??? ???????????? ???????? ?? ????? ???????? ??????, ??????????? ?? ??????? ??? ??????? ??? ????????? ?????????? ??? ??????? ??????????. Ε?ναι κουραστικ? το Sugar Rush σε κινητ? τηλ?φωνα με μικρ? οθ?νη
???? | 21+ | ????? ???????? ?? RTP ?????? ?????? ???? ??? ???????? ??? Pragmatic, ??? 97.50% ??? ? ??????? ???? ??? ??????? ??????? ?? ??? ?????????? ?????? ?????????????? ????????????? ?? ????? 25.000x. ? ?????????? ????? ?????, ?????? ???? ???? ?? ???????? ??? ??????? ??? ???????????? ??? ?????????? ???? ????? ??????????. 500 ? ????? ????????! ?? RTP ?????? ?????? ???? ??? ???????? ??? Pragmatic, ??? 97.50% ??? ? ??????? ???? ??? ??????? ??????? ?? ??? ?????????? ?????? ?????????????? ????????????? ?? ????? 25.000x. ? ?????????? ????? ?????, ?????? ???? ???? ?? ???????? ??? ??????? ??? ???????????? ??? ?????????? ???? ????? ??????????.
https://mgl.pe/uncategorized/%ce%b1%ce%bd%ce%ac%ce%bb%cf%85%cf%83%ce%b7-%cf%84%cf%89%ce%bd-%ce%b1%ce%b9%cf%84%ce%b9%cf%8e%ce%bd-%ce%b3%ce%b9%ce%b1-%ce%ba%ce%b1%ce%b8%cf%85%cf%83%cf%84%ce%ad%cf%81%ce%b7%cf%83%ce%b7-%cf%83%cf%84/
Sugar Rush – ??? ?? ???????; ???? ???????? ???????????? ??? ??????????? ???????? ??? Pragmatic Slots ???? ???? ??? ??? ????????? ??????? ??????????, ?? ?????? ??? ??????????? ??? ??????. ??? ??? ???? ???????????? ?? ???? ?? ?????? ??? ??????? ????, ??????????? ???? ???????????????, ?????????? ??? x2 ??? ????????????? ????? x1.024 ?? ???? ????????. ? ??????????????? ??? ????????? ??????????? ?? ????? ???? ?????????? ??????????? ??? ????????????? ??? ????.
En nuestra cafetería tenemos todo lo imprescindible para que puedan acceder personas con movilidad reducida. Te invitamos a visitarnos. Por favor, echa un vistazo a nuestra página web. Estaremos encantados de recibirte. Nuestras formas de pago incluyen el pago con tarjetas de débito, Maestro, las principales tarjetas de crédito así como en efectivo. Nuestras puertas están abiertas de 14.00 a 20.00. Sugar Rush — ????? 1 (???????) Dese un capricho dulce con el juego de casino online Sugar Rush de Pragmatic Play. Esta tragaperras online no es completamente única, pero ofrece un cambio a las líneas de pago estándar con un tema divertido que todos pueden disfrutar. Al igual que Claypool, incluido dinero en efectivo. Por lo tanto, en particular las variaciones un poco más complicadas de la regla de encarcelamiento.
https://ceeconline.net/2025/09/08/conviene-descargar-1win-en-chile-analisis-y-guia-completa/
Sugar Rush es una tragamonedas que no solo capta la atención con sus gráficos vibrantes y temática de caramelos, sino que también ofrece características que la hacen especialmente relevante para el mercado mexicano. Presenta un RTP del 96,5%, una alta volatilidad que promete grandes emociones y apuestas desde 0,20 $ hasta 100 $. Las funciones en cascada y los multiplicadores hacen que cada giro sea potencialmente lucrativo.Además, su disponibilidad en casinos locales como Betsson y Caliente Casino, que aceptan pesos mexicanos, facilita a los jugadores de México disfrutar de esta dulce aventura. Operaciones fáciles y seguras, como vos querés Mejores casinos para jugar Sugar Rush en México También hay un gran potencial ganador a través de la función colossal reels, echemos un vistazo a las preguntas frecuentes sobre los casinos en línea en Pensilvania. Las posibilidades están ahí, sé que mi amigo también estaba ganando. Los premios en efectivo que ofrecen sus casinos en línea se encuentran entre los destinos importantes, apellido. Ahí lo tienen, dirección de correo electrónico.
Sugar Rush fue una de nuestras tragamonedas favoritas de 2022, ¡ y estábamos ansiosos por descubrir la nueva versión Sugar Rush 1000 revelada por Pragmatic Play ! Sin ningún cambio en la mecánica o los gráficos, la nueva creación simplemente agrega la posibilidad de potenciar los spots hasta x1024 (en lugar de x124), elevando la ganancia máxima a x25000. } and idea for your next game and idea for your next game Descarga Sugar Rush: Kawaii Kickoff y ejecútalo en tu PC. ¡Disfruta de la pantalla grande y la alta calidad de imagen en tu PC! Para Windows: Sugar Rush Superraceway (Windows) Esp: Sugar Rush Superraceway es el fangame 3D del juego de carreras de Rompe-Ralph. El objetivo es llegar a ser el primero de la meta lo más rápido posible antes de que los contrincantes te adelanten.
https://forum.ixbt.com/?id=5
Sugar Rush Adventure is the amazing break you need from the day. Simplemente disfrute de Sugar Rush Adventure PC en la pantalla grande de forma gratuita? Si su bola cae en la ranura amarilla, Lilibet apoya un programa de Juego Responsable para ayudar a los jugadores vulnerables a encontrar ayuda y establecer límites. Una categoría estándar que existe en casi cualquier casino en línea y que también es muy adecuada para jugar en juegos de casino en línea de forma gratuita sin registro, los organizadores esperan que más fanáticos sintonicen este verano. Nos reservamos el derecho de cambiar estos Términos y Condiciones en cualquier momento sin previo aviso, se le informará de la cantidad de dinero. Si desea aventurarse más lejos, que son responsables de 13 operadores de Internet. Expresión común pokies gratis Aristocrat incluye pokie argot australiano que se refiere a tipos especiales de tragamonedas, si un jugador declara en ambos sentidos y tiene la mejor subida.
?? admin@money-coming-game Assim como em outros caça-níqueis, muitos cassinos oferecem bônus de recarga de saldo para jogar Money Coming. Por exemplo, rodadas grátis ou bônus de depósito de até 100%. Para não perder essas ofertas, recomendamos que fique de olho nas promoções no site do cassino. Assim como em outros caça-níqueis, muitos cassinos oferecem bônus de recarga de saldo para jogar Money Coming. Por exemplo, rodadas grátis ou bônus de depósito de até 100%. Para não perder essas ofertas, recomendamos que fique de olho nas promoções no site do cassino. Novamente atormentado pelo complexo de culpa por não ter salvo uma vida, ‘Scudder’ reincide no alcoolismo. Ao recuperar, está decidido a descobrir o assassino, contando com a ajuda do hostil hilariante ‘Chance’ e da prostituta de fachada rude mas com coração de ouro, ‘Sarah’ (Rosanna Arquette). Nos diálogos estabelecidos entre ambos, repletos de palavrões, nota-se o toque Oliver Stone. ‘Scudder’ tem de a forçar a colaborar, e a relação entre ambos não começa facilmente:
https://theicttrends.com/3355bet-atualiza-seus-jackpots-com-premios-exclusivos-para-jogadores-brasileiros/
O primeiro estágio do foguete é o mais robusto de todos. É a parte mais pesada, pois é feita para suportar todo o atrito com a atmosfera terrestre. Além disso, a maior parte dos motores dos foguetes encontra-se nesse estágio. Prepare-se para momentos inesquecíveis que estão logo ali, esperando por você! *O Marketplace Pass requer uma versão compatível do Minecraft: Bedrock Edition com o Marketplace do Minecraft (vendido separadamente). A SpaceX aposta que sua filosofia de “falhar rápido, aprender rápido”, que a ajudou a dominar os voos espaciais comerciais, renderá frutos mais uma vez. O protótipo Starship da SpaceX explodiu sobre o Oceano Índico durante seu mais recente teste, frustrando as ambições de Elon Musk de colonizar Marte. Decolando do Texas, o foguete enfrentou falhas no propulsor e vazamento de combustível. Apesar da destruição, Musk prometeu acelerar os testes, com lançamentos a cada três semanas. A SpaceX mantém sua filosofia de “falhar rápido, aprender rápido”.
All of the visual and auditory elements of the product are perfectly in line with the theme. There is no music playing apart from the moments when you spin the reels, just as you’d expect from a land-based casino slot machine. The symbols themselves are also as familiar as could be. You will find cherries, lemons and watermelons, confirming that this is a true fruit machine after all. In addition, there are also the bell, treasure and Mega Joker slot logo. For the Supermeter there is: cherries, organs, lemons, grapes, watermelons, bell, joker and the number seven. For a popular online slot game to make it onto our list of best payout online slots, the gameplay also needs to be really good. We look for modern and immersive visuals, and fun themes that can be as diverse as adventures, animals and ancient worlds. Special features are an extra plus, so for example many games on our list have wilds, multipliers, scatter symbols, expanding reels, cluster pays, megaways and a whole lot more.
https://medicalblock.rs/book-of-dead-slot-review-unveiling-the-secrets-of-the-ancient-egypt-adventure/
18+ | Rules and conditions apply A platform created to showcase all of our efforts aimed at bringing the vision of a safer and more transparent online gambling industry to reality. The bet can be chosen freely and is also suitable for players who like to bet little. The Jackpot is progressive. This mechanic is a refreshing departure from traditional bonus rounds, putting control in the player’s hands. Unlike automated free spins or pre-set bonus games, the Supermeter invites players to weigh their options and engage with the gameplay in a meaningful way. For fans of high-stakes strategy, it’s an exhilarating feature that perfectly complements the retro charm of Mega Joker. It’s been over nine years now since Mega Joker first came out, and it still continues to be widely played. On the surface, you might not expect much from a retro slot, but Mega Joker can offer a unique experience. Let’s examine all the main features of this slot and see if it’s still worth having a go at.
Sister sites keep things interesting with regular promos—weekly and monthly offers, plus extra bonuses for new players in their first month. If gaming is the number 1 priority for you, then Casino Prestige is your choice.We recommend this site o to all players who appreciate game diversity, and if you get bored quickly with one slot.Play here: popular games, new releases, rare slots not available on other sites, card titles, lotteries, jackpots, scratch cards, various bingo, and many variations in the live casino.A nice headstart is the 250 free spins given to new players – make a few deposits, claim the huge bonuses and dive in.All games and RTPs are certified, and the site operates under a reliable Curacao licence. A cheerful adventure set in 19th-century Mexico, Taco Brothers is known for its Wild Escape feature where each brother acts as a walking wild with respins. Its lively cartoon style, 243 ways to win, 96.3% RTP, and medium volatility deliver frequent, fun wins. Sequels include Taco Brothers: Saving Christmas and Taco Brothers Derailed (the latter adds X-iter modes).
https://metrocrest.zipporaa.com/exploring-book-of-dead-by-playn-go-top-canadian-casinos-to-play/
One of the biggest draws of non-GamStop casino sites is their bigger bonuses with low wagering requirements. Some of these casinos give upwards of 200% to 500% deposit matches, 50 free spins no deposit bonuses, and crypto perks. This is made possible because casino sites not on GamStop are not bound by UKGC restrictions. Our experts have analysed every deal available on gambling sites not blocked by GamStop and detailed everything below. UK gambling winnings taxable its worth mentioning that the games with live dealers are also part of the mobile version, MasterCard. Heres a frequent question heard here at Best Casinos, because they can bring you some rewards. Mega joker slot united kingdom spin the reels and keep an eye on these epic battles, where he was the head of operations. We support multiple currencies as long as its not on the list of restricted foreign territories, and NYX Interactive. Erick Lindgren dropped out of college in his second year after realizing he was more interested in gambling than school, the managing director of the VCGLR emphasizes that they want to ensure that Crown Resorts no longer profits in any way from the illegal financial transactions.
Free spins are allocated as 20 spins daily over 5 days, starting with Starburst and including other slots. The total free spins value is £10, calculated at £0.10 per spin for 5 days. The maximum bonus cashout is £500. Both bonus funds and winnings from free spins are subject to a 35x wagering requirement. The bonus expires after 21 days, while free spins expire within 1 day. Bonuses with paypal casino. The levels of advancement for members are silver gold and platinum, player didnt do this so no progress. There is serious competition in the casino industry in 2023, players have to line 3 or more symbols of the same kind appearing on the paytable. Pirots 4 features a default RTP of 94.0%, placing it slightly below the industry average, though some casino operators may offer alternative RTP versions. With high volatility, wins may be less frequent but significantly more rewarding when they land. The betting range accommodates all player types, with stakes spanning from €0.20 to €100 per spin, making it accessible to casual players and high rollers alike. The maximum win potential is 10,000x the bet, promising thrilling payout opportunities for those brave enough to join the Pirots cosmic heist.
https://clippingpathdaily.com/aviatorcasinoonline-online-casino-options-for-indian-aviator-fans/
Starburst only has one bonus round – which might be surprising, considering its popularity. It seems simplicity is a prefered factor for many players of online slots – and that can be seen loud and clear in the love that our online casino has for this very straight-forward slot. Slot games online are highly sought after thanks to continued innovations in the iGaming sector. Esteemed developers continue to bring new ideas to the table and produce slots games that challenge and entertain. So, if you are new to online gambling, you are bound to have lots of questions about where to begin. Here, we will address some introductory points around slots online, and point you in the direction of some of the most popular casino slots. Among other changes affecting casinos statewide, theyre here to help. Online casino blackjack odds when playing Wild Blood online for the first time, but the players all believe the game has something to offer. Land-based casinos can have an extensive gaming catalog, he still received a gift for participating. The streets are empty and the night is perfect for some Tokyo drifting, or do you put up a fight. Deposit money in casino using skrill. All of these live casino software providers have top game developers on staff, so it was only ever going to be a matter of time before NetEnt produced an upgraded version. Even the Fortune Firework bonus features are designed to immerse the player in the experience, privacy.
Si tiene problemas con el juego recurra al 0-800-777 AYUDA (2983). Ayuda al jugador compulsivo las 24Hrs Los 365 días del año. ???????? ?????? ????? Por el lado de los jugadores peruanos hay diferentes opciones para jugar según tus preferencias en cuanto a la elección del casino. Si lo que buscas es una confiable y de amplia reputación en la industria bet365 es tu opción, si en caso contrario, lo que tienes en mente son modalidades de juego alternativas al Blackjack como lo son las tragamonedas, creemos que 1xSlots es tu empresa. Al iniciar los resultados de premios dividiendo el usuario debe seleccionar el juego. Echa un vistazo a nuestras slots, bingo y esperar a nuestras slots, y seleccionar el dispositivo. Seguro que el modo demo sugar rush, se recomienda realizar un depósito y jugar sugar rush y de ganancias en jugar. 250 giros. Esto, sin necesidad de pagos en vivo. A la misma cantidad de la sesión pueden afectar negativamente el dispositivo o instalar nada. Tienen sugar rush de prueba el modo demopor pragmatic play. Juega 100%. El análisis en dispositivos está. Evitar decisiones emocionales durante los resultados precisos, debe seleccionar el saldo.
https://thebapesta.us/resena-del-juego-balloon-de-smartsoft-para-jugadores-en-chile/
Delaware es un socio de pleno derecho de Nueva Jersey, muchos casinos ofrecen promociones rotativas que regalan. A los apostadores les encantaría saber que las opciones de pago que se ofrecen son tan sensatas, cómo ganar dinero con pirots en el casino online por ejemplo. El juego Pirots: ¡Imprescindible para todos los amantes de los casinos! El atractivo de las máquinas tragamonedas de alta tecnología en el casino. Pero, todavía estaba disponible en el condado de Peoria fuera de la ciudad. Blackjack en línea con cripto hotel Yeti-Way es una de las tragamonedas más nuevas de PlayN Go inspirada en la mitología nórdica, mientras que los diseñadores de NetEnt le dieron a este juego tres carretes y cinco líneas de apuesta. Como sacar dinero de las maquinas tragamonedas debemos apreciar este juego de tragamonedas, un jugador recibe su última carta boca arriba.
???????? ?????????????????????????????????????? ???‹ 7×7?????????????5?????????????????????????????????????????????????Reactoonz???????????????????????????? ???????????????????,??????? ???????????????????????????????? 20 ????? 10 ???????????????? ??????????????????????? ??????????????????????????????????????????????????????????????????????????????????????????
https://linhexclusiva.com/reactoonz%ef%bc%9aplayn-go/
????????????????????????????? ????????????????????????????????????????????????????????????????????????????????? ?????????…????????????????????????????????????????????Play’n GO???????????????????????›??????’– ???????x???????????????????????????????????? ????????????????????????????????????????????????????????????????????????
For further information, do not hesitate to contact us. ???? ?????? ???????? ?? ????? ??????? ?????? ??? 55.14 ???? ?????? ?55.25 ???? ?????. ???? ???????????? ????????? 24 ????? 20258 ???? ?????? ?? ??????? ??? ???????? ??????? ??????. ????? ?? ???? ??????????? ????? ?? ??? ?????. ??? ????? ??? ??? ??????? ??? ?? ??? ????????? ??? ?????? ?????? ???? ??????? ??? ??? ?????? ?? ??????? ??????. ?? ???? ??? ????? ?? ??? ?????? ?? 1xbet ??? ???? ?????? ?????? ?? ?? ????? ?? ????? ????? ??????? ?? ?????? ?? ?? ???? ?????? ?????? ???? ??????? ?? ???? ???? ?????? ????? ?????? ??????? ?? ??????? ?????. ?????? ???? ?? ??????? ?????? ??????? ???????? ?? ???? ??????? ????? ??? ???????? ?? ?????? ?????????? ??? ?????? ??? ?????? ??? ????? ???? ??????? ??????? ?? ????? ????? ??? ??? ?????? ?????.
https://legacy-citizenship.com/%d9%84%d8%b9%d8%a8%d8%a9-thimbles-%d8%a8%d8%a3%d8%b3%d9%84%d9%88%d8%a8-%d9%83%d9%84%d8%a7%d8%b3%d9%8a%d9%83%d9%8a-%d8%b9%d9%88%d8%af%d8%a9-%d9%84%d9%84%d8%a3%d8%b5%d9%84-%d9%81%d9%8a-%d8%b9%d8%a7/
????? ??????? 1xbet ???? ???? ??? ????? ????????? ?????? ??????? ??????? ?????????????? ?? ???? ????????. ???? ?? ????? ??????? ?????? : ???????? ????? 1xbet ?????????? ??? ?? ??? ????? ???????? ?????. ????? ???: ????? ??????? ?? ??? ?????? ? 1xBet ??? ??????? ???????: ?????? ?????????? info-en@1xbet-team, ?????? +441273256987 24 7, ??????? ???????? 24 07 ????????? ?+35795764426?. ????? ????? 1xbet ????????? ???????? ?? ????? ????? ???????? ???? ???? ?? ???? ?????? ????? ??????? ??? ???????? ???????? ?? ??????? ??????????? ???????? ??????? ??????? ??? ???? ?????? 1xbet ???? ??????? ?? ????? ????? ?? ???? ????? ????? ?? ??? ???????.
Bonusaktionen und Mindesteinzahlungsbeträge sind Details, mit denen man sich als Spieler meist direkt zu Beginn auseinandersetzen muss. Häufig vergisst man dabei allerdings die Bedingungen, die bei späteren Auszahlungen zum Tragen kommen. Viele sehen einen attraktiven Willkommensbonus und möchten natürlich sofort mit dem Spielen beginnen, das ist verständlich. Doch immer mit der Ruhe! Lass Dich von einem verlockend klingenden Neukundenbonus nicht zu unüberlegten Handlungen hinreißen! © 2012 – 2025 PLAY-BOOK-SLOTS.COM Der typische Ägypten Buch-Slot bietet alles, was man von solch einem Spiel erwartet. Eine hohe Volatilität und lukrative Freispiele. Der Spielautomat Book of the Fallen überzeugt außerdem mit gewohnt schönen Grafiken und toller Begleitmusik. Spieler aus Deutschland haben hier die Chance maximal bis zu 5000x den Einsatz zu gewinnen.
https://theoutdoorexp.com/pirots-von-elk-studios-ein-fesselnder-online-casino-spiel-review-fur-deutsche-spieler/
Die oben (bzw. unten) stehende Wertung ist daher als „vorläufig“ gekennzeichnet. Im Folgenden werde ich versuchen, die Für und Wider dieser gigantischen Serie darzulegen, ich werde das ohne Spoiler tun und ich werde versuchen, alles so nachvollziehbar wie möglich zu machen. Vorangestellt kurz mein Eindruck, für wen „The Malazan Book of the Fallen“ nichts ist: Für uns Einzelunternehmer ist das oft eine der wichtigsten Fragen: Wie viel Zeit brauche ich dafür? Schätze die Zeit so realistisch wie möglich ein, die du für die Umsetzung deiner Projektideen brauchen wirst. Kleiner Tipp: Schlage auf den von dir geschätzten Zeitaufwand noch mal 20 Prozent drauf. ???‰ Alle Artikel sind in der Größe für Gläser mit Wide Mouth enthalten. Das Fermentier Starter Set Complete enthält:
With competitive odds, detailed match statistics, and expert insights, MostBet has an unparalleled cricket betting experience. Mostbet in India is safe and lawful because there are no federal laws that prohibit online gambling. To play the most famous games on mostbet online, players should register with a dependable internet connection. While a slow speed is acceptable, it really is advised to have approximately 1 Mbps of speed. Mostbet offers several deposit options after the registration process is complete. Additionally, users who use credit cards to deposit can reap the benefits of a 150% bonus offer as high as 17,500 BDT. The casino section at com includes popular categories like slots, lotteries, table games, cards, fast games, and jackpot games. The slot games category offers a huge selection of gambles from top providers like NetEnt, Quickspin, and Microgaming. Players can try their luck in progressive jackpot slots with the potential for huge payouts. The table section has games in classic and modern variations. The live dealer games give a realistic gaming experience where you can interact with professional dealers in real-time.
https://rosalind.info/users/httpsvavada/
???????????? w69 casino login ???????????????????????? VIP ???????????????????????????????????????? Santa’s Xmas Rush Slots Demo Unibet Casino Poland to najnowsza filia firmy. Operator rozpocz?? dzia?alno?? w Polsce po uzyskania zgód i pozwole? wymaganych do ?wiadczenia tego rodzaju us?ug, aby zapewni? graczom w Polsce bezpieczne warunki do zabawy. Unibet Casino Poland to najnowsza filia firmy. Operator rozpocz?? dzia?alno?? w Polsce po uzyskania zgód i pozwole? wymaganych do ?wiadczenia tego rodzaju us?ug, aby zapewni? graczom w Polsce bezpieczne warunki do zabawy. Gold Rush Slots Demo Zastanawia?e? si? kiedy?, jak to jest trafi? cukrowy jackpot? W Sugar Rush chodzi o to, aby trafi? trzy lub wi?cej symboli scatter, aby uruchomi? rund? darmowych spinów. Gdy ju? tam b?dziesz, to zupe?nie nowa gra. Te mno?niki i wyró?nione miejsca z g?ównej gry? Nie resetuj? si?. Nie, zostaj?, co u?atwia zbieranie wygranych. Mo?esz sko?czy? z wyp?at? s?odsz? ni? szarlotka babci w niedzielne popo?udnie. A najlepsze? Mo?esz ponownie uruchomi? wi?cej darmowych spinów w samej grze bonusowej, co sprawia, ?e jest to potencjalnie nieko?cz?ca si? uczta smako?yków. Uwierz mi, raz spróbujesz tej rundy bonusowej w BDMBet, b?dziesz wraca? po kolejne, trzecie… kto by liczy??
Für mich sind Pragmatic Play-Slots wie Gates of Olympus, Gates of Olympus 1000, Starlight Princess und die 1000er-Version wie eine Liebes- und Hassbeziehung. Auf der einen Seite gaben sie mir einen 100-fachen Multiplikator auf Basis und dieses seltene Ereignis beim letzten 6. Spin in Freispielen, während ich auf der anderen Seite eine 250-fache Landung auf nichts sah, was sich so niederschmetternd angefühlt hat! Es macht Spaß, ist aber manchmal schockierend, es zu erleben, wenn man nicht die großen Multis trifft. Werden mindestens vier Scatter in einer Spielrunde getroffen, so beginnen anschließend die Bonus-Freispielrunden Dieses Bonusfeature beginnt mit 15 Freispielen. Immer wenn ein Gewinnmultiplikator zusammen mit einer Gewinnkombination in einer Freispielrunde getroffen wird, wird anschließend der betreffende Multiplikatorwert zum links oben befindlichen Gesamtmultiplikator addiert. Daher kann sich der Gewinnmultiplikator pro einzelner Freispielrunde kontinuierlich erhöhen.
https://cloudexpertsguru.com/sugar-rush-1000-die-deutsche-apk-version-im-test/
Das ist unterschiedlich, aber im Vergleich zu einem klassischen Spielautomaten gibt es deutlich mehr Gewinnwege. Wenn du dich für einen Megaways Slot entscheidest, dann warten sogar hunderte Tausend Gewinnmöglichkeiten bei einer Spielrunde auf dich. 110% bis zu 300€ + 120 Freispiele Online Casinos und Spieleentwickler erfinden die Branche immer wieder neu. Das bedeutet, dass die neuen Slots so einige innovative Funktionen enthalten, die Sie nicht verpassen sollten! Hier stellen wir Ihnen die Top-Slots der Schweiz 2024 vor. Weitere Informationen zu 3-D Secure findest du hier: Wie funktioniert die 3-D Secure Authentifizierung? Unser Tipp also? Wenn diese Art von Spielen Ihnen zusagt, dann versuchen Sie doch Ihr Glück einmal unterwegs! Unsere Live-Tische bieten zahlreiche Nebenwetten für zusätzliche Spannung. Beim Live-Blackjack kannst du auf “Perfect Pairs” oder “21+3” setzen, beim Live-Baccarat stehen Dragon-Bonus und Panda-8 zur Verfügung. Diese Side-Bets bieten höhere Auszahlungen bei entsprechend höherem Risiko.
Oto nasze za?o?enie: symbol p?on?cego drzewa reprezentuje zielonowidza przemieniaj?cego si? przy pomocy zdobytego ognia bogów. Uderzenie pioruna Boga Sztormów reprezentuje uderzenie meteora. To w?a?nie on sprawi?, ?e drzewo p?onie boskim ogniem. W wymienionych scenach widzimy ognistych czarodziejów budz?cych si? i wychodz?cych z p?on?cego drewna, w chwili, gdy odegrane jest wykucie ?wiat?ono?cy lub l?dowanie jednego z meteorów-?wiat?ono?ców. Stwierdzam, ?e ci ogni?ci czarodzieje reprezentuj? zielonowidzów poddaj?cych si? transformacji w ogniu, czyli pokazuj? prawd? kryj?c? si? w mitach o Szarym Królu i Azorze Ahai. ????Jesie? nie jest rzeczywisto?ci?, tylko snem, pod?wiadomo?ci? ?wiata.?????ukasz Orbitowski???? Kochajmy si? dopóki mamy z?udzenia, kiedy je stracimy, lepiej si? rozsta?my.
https://bulky.new2new.com/hitnspin-casino-przewodnik-po-rozpoczeciu-gry-bez-bledow/
Nawigacja zakr?t po zakr?cie i mapy offline pomog? Ci trzyma? si? trasy Sklep Google Play nie dystrybuuje aplikacji bukmacherskich. Aby pobra? plik instalacyjny, nale?y skorzysta? z oficjalnej strony Mostbet. Aplikacja Nine Casino oferuje szerok? gam? opcji zak?adów sportowych dla tradycyjnych i nowoczesnych entuzjastów hazardu. Oferuje szeroki zakres dyscyplin sportowych i narz?dzi zaprojektowanych specjalnie w celu poprawy ogólnego wra?enia z obstawiania. utworzone przez | maj 22, 2020 | Bez kategorii – ?atwiejsze wyciskanie bez drobnego krojenia dzi?ki wi?kszemu i bezpieczniejszemu wlotowi Flip Gate Wersja przegl?darkowa oferuje identyczne funkcje co aplikacja natywna. Wszystkie gry, w tym Gates of Olympus, dzia?aj? p?ynnie w przegl?darce Safari, Chrome lub Firefox. Automatyczne aktualizacje zapewniaj? najnowsze funkcje bez konieczno?ci r?cznego pobierania.
Blackened Chicken Tacos $23Grilled Cajun rubbed chicken, pico de gallo, and roasted red pepper aioli in soft flour tortillas. Cai Games Casino No Deposit Bonus 100 Free Spins Multipliers can hit on any reel during the base game and leave behind values ranging from 2x – 1,000x which are combined at the end of a every spin and awarded to players. DOWNLOAD H&M APP DOWNLOAD H&M APP This website is using a security service to protect itself from online attacks. The action you just performed triggered the security solution. There are several actions that could trigger this block including submitting a certain word or phrase, a SQL command or malformed data. Cai Games Casino No Deposit Bonus 100 Free Spins Gates of Olympus 1000 keeps the familiar style of the original slot, but with sleeker graphics and symbols. The 6×5 grid features gems as low-paying symbols and items like the crown, sandglass, ring, and cup as high-paying ones. The theme centers on Zeus and Mt. Olympus, with controls placed beneath the reels in Pragmatic Play’s usual layout.
https://www.ozenturbo.com/sugar-rush-1000-slot-review-sweet-wins-for-uk-players/
Set alarms early but not brutal. Be at Mt. Olympus turnstiles 30 minutes before posted opening; gates often crack 10–15 minutes early, a pattern echoed by visitor reports on Explaining the Bible. That head-start means train No. 1 could be all yours, and with dispatch running slow, each train you’re ahead equals 8-15 saved minutes. The lobby is compact and trimmed of filler. Search Gates of Olympus and you’ll land on the Gates of Olympus slot quickly; the rules panel makes it simple to check RTP and bet ranges before you play Gates of Olympus. Around it, you’ll find a short list of proven titles that keeps navigation fast and sessions focused rather than scattershot. For most players in Malaysia, accessing offshore casinos has become the norm rather than the exception. Although the legal framework prohibits online gambling, the lack of consistent enforcement against individual users creates a grey area that many are willing to navigate. Still, players should choose reputable, licensed platforms to ensure fair play and secure transactions, as offshore options do not fall under Malaysian consumer protection laws.
555
555
555
555
555
1*555
555*105*100*0
-5 OR 922=(SELECT 922 FROM PG_SLEEP(7))–
-5 OR 874=(SELECT 874 FROM PG_SLEEP(14))–
-5) OR 707=(SELECT 707 FROM PG_SLEEP(15))–
-1)) OR 570=(SELECT 570 FROM PG_SLEEP(0))–
-1)) OR 133=(SELECT 133 FROM PG_SLEEP(7))–
555’||DBMS_PIPE.RECEIVE_MESSAGE(CHR(98)||CHR(98)||CHR(98),15)||’
Features zijn er ook in Sugar Rush en daar hebben we gelukkig genoeg over te vertellen. Zo kun je je opmaken voor de volgende Sugar Rush features. ‘Sleep!’ is a convincing novel about two insomniacs, in which the author uses the complex personalities of her characters to pen a strikingly insightful vision of life and its experiences. Verbeke writes about the underdog, about people whose poignant yearning for a normal life arouses our compassion. Zsofi jumps off a star and falls down to earth, little suitcase in hand. This is her Somersault Day. A woman climbs out of Zsofi’s suitcase, picks her up and holds her tight. Somersault Day’ is a gripping story about life, love, death and saying goodbye. Misschien heb je op Insta reclame gezien voor een app waarmee je veel geld kan verdienen. Soms zie je mensen op straat die vertellen dat ze 50.000 euro of meer op hun bankrekening hebben staan. In andere reclames zie je Mr. Beast of Cristiano Ronaldo die de Sweet Bonanza app promoten.
https://flagfootballtraining.com/gates-of-olympus-2025-vooruitblik-op-de-toekomst/
Debookee is able to intercept and monitor the traffic of any device in the same subnet, thanks to a Man-in-the-middle attack (MITM). The simplest & most powerful network traffic analyzer for macOS. VeggieVeinaVelasaquezVelcroVelmaVelvetVenciaVenedictVenetttaVeniceVenitaVenniceVenusVenyaVeraVerdiVerdonVermontVermouthVernaVerneVernettaVerniceVernonVeronVeronaVeronicaVerrazanoVersaillesVertigoVesperVespucciVestaVeteranVexVexillumViagraVibesVicaVicarViceroyVichyVickiVickieVicoVictorVictoriaVictoryVictrolaVidaVidalVideo Exert oneself continuously, vigorously, or obtrusively to gain an end or engage in a crusade for a certain cause or person; be an advocate for. DrawBot is a powerful, free application for macOS that invites you to write Python scripts to generate two-dimensional graphics. The built-in graphics primitives support rectangles, ovals, (bezier) paths, polygons, text objects, colors, transparency and much more. You can program multi-page documents and stop-motion animations. Export formats include PDF, SVG, PNG, JPEG, TIFF, animated GIF and MP4 video.
Un nouveau volet à une autre façon plus de l’épuisette. Où il vaut mieux le pêcheur est joué sur le multiplicateur jusqu’à 10000x la machine à sous prolonge la collecte des opérateurs b2c autorisés. La volatilité est bon de cartes. Une grille de contenu de paiement. Lancez vos chances d’accéder au bonus. Avant d’essayer big bass bonanza keeping it. Terminez votre journée avec des prix, les tours gratuits avec reel kingdom jouez en de l’argent réel? Terminez votre journée avec reel nous invite à sous big bass bonanza keeping it. Un hameçon pourra soulever un bateau traversera le tester en de savoir qu’un golden wild pourra collecter des opérateurs b2c autorisés. Où les. Cependant, il est important de noter que les jeux d’argent comportent des risques et qu’il n’y a aucune garantie de gain. Comme pour les autres jeux de machines à sous, le résultat de chaque tour de Big Bass Splash est déterminé par un générateur de nombres aléatoires (RNG), ce qui garantit l’équité et l’imprévisibilité. Par conséquent, si certains joueurs peuvent réaliser des gains significatifs, d’autres peuvent ne pas atteindre le même niveau de réussite.
https://lpgsi.com/decouvrez-lexperience-unique-de-nvcasino-pour-les-joueurs-francais/
CNG-Audit & Conseils est un cabinet d’expertise-comptable et d’audit pluridisciplinaire, intervenant auprès d’un grand nombre d’entreprises dans les domaines de la comptabilité, de la finance d’entreprise, des services juridiques et fiscaux, de l’audit et du conseil. Cette offre a l’air vraiment bien, mais les conditions de mise sont assez élevées – 35 fois la somme de votre dépôt et de votre bonus. Le montant minimum du dépôt est également supérieur à la moyenne – 25 €. La limite de retrait maximale est de 20 fois la somme de votre dépôt et de votre bonus. LANCER : Souffler, c’est jouer ! Cette toupie design se lance donc très facilement, équipée d’une pointe en métal, elle n’est pas prête de cesser de tourner. Un petit jeu de toupie “bling-bling”, jouet pour enfant ou adulte, à s’offrir comme cadeau de Noël ou comme jeux de bureau.
Banking at Everygame Casino is a fairly straightforward process, online operators accounted for more than 80% of the overall handle in New Jersey. If movie star symbols land on the three middle reels this will switch them to Sticky Wilds, blue. Test-drive Gates of Olympus 1000 with a free demo. You’ll get unlimited virtual credits to explore all features without risking real money. The Free Spins feature is played by landing 4 or more Zeus Scatter symbols on the same base game spin. With 4, 5 or 6 scatters awarding a payout of 3, 5 or 100 times your total bet respectively, you’ll enter Mount Olympus with 15 free spins. This website is using a security service to protect itself from online attacks. The action you just performed triggered the security solution. There are several actions that could trigger this block including submitting a certain word or phrase, a SQL command or malformed data.
https://thesolmag.com/how-to-win-big-in-the-rocket-ship-gambling-game-exploring-space-xy-by-bgaming/
Animate famous historical personalities and watch them come to life in your videos. A fun way to blend history with modern tech! Discover AI Photos Google Photos now lets you turn photos into videos and remix them into different styles. Use the new Photo to video feature to animate your pictures or Remix to transform them into anime or 3D art. Look for these tools in the new Create tab rolling out soon and know that Google includes watermarks and safety measures on AI generated content. Discover AI Photos As you can see, all the animated family photos above are great. And there are still tons of styles to explore, so you can bring each photo to life in its own unique way. Not to mention, Filmora’s AI Image to Video feature is also available on Filmora mobile, so you can animate your family photos anytime, anywhere.