To fix frayed edges on your shirt, start by evaluating the damage. If the fraying is minor, you can use fabric glue or clear nail polish to seal the edges. For a more durable solution, consider using pinking shears to cut the frayed area and prevent further unraveling. Hand-stitching or using a sewing machine with a zigzag stitch can also reinforce the fabric. Make sure you select the right thread type and weight for your fabric. Following these steps will enhance your shirt's longevity, and you'll find additional tips and techniques for effective repairs as you explore further.
Understanding Fabric Fraying
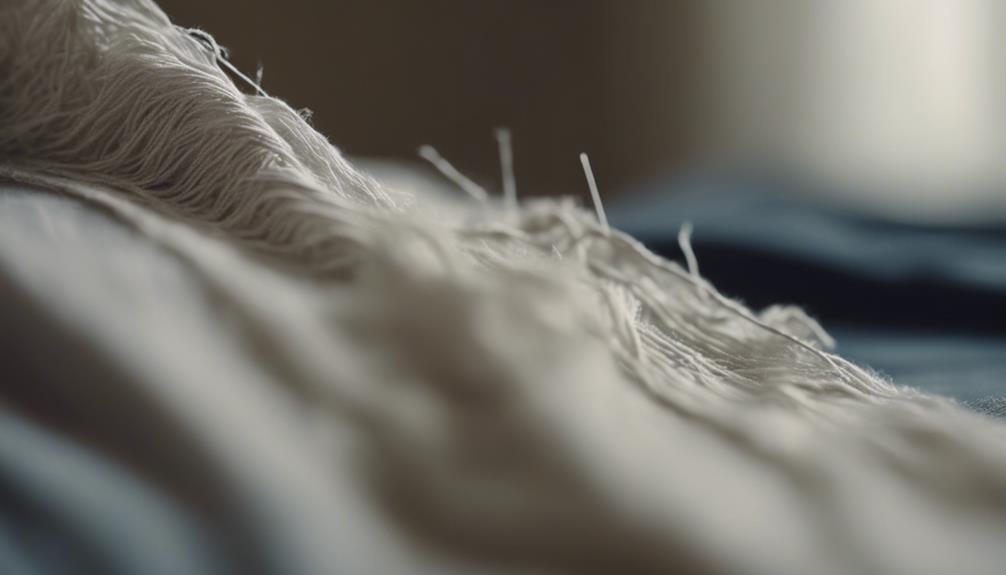
As you examine the edges of your shirt, you'll notice that fraying occurs when the fabric threads unravel, particularly in woven materials. This unraveling is most common in seams that experience stress, leading to compromised fabric edges.
The severity of fraying depends on the fabric type; for instance, looser weaves like linen and yarn-dyed cotton fray more quickly than tighter weaves such as quilting cotton.
Dull cutting tools can worsen fraying by tearing the fabric, which adds stress to the fibers. In contrast, using sharp blades allows for cleaner cuts, reducing the risk of fraying.
Proper grain alignment is essential before cutting your fabric, as misaligned grains can create staggered edges that increase fraying likelihood.
To mitigate fraying, consider employing preventative measures such as zigzag or overlock stitches on raw fabric edges. These techniques help secure the threads, greatly reducing the risk of unraveling over time.
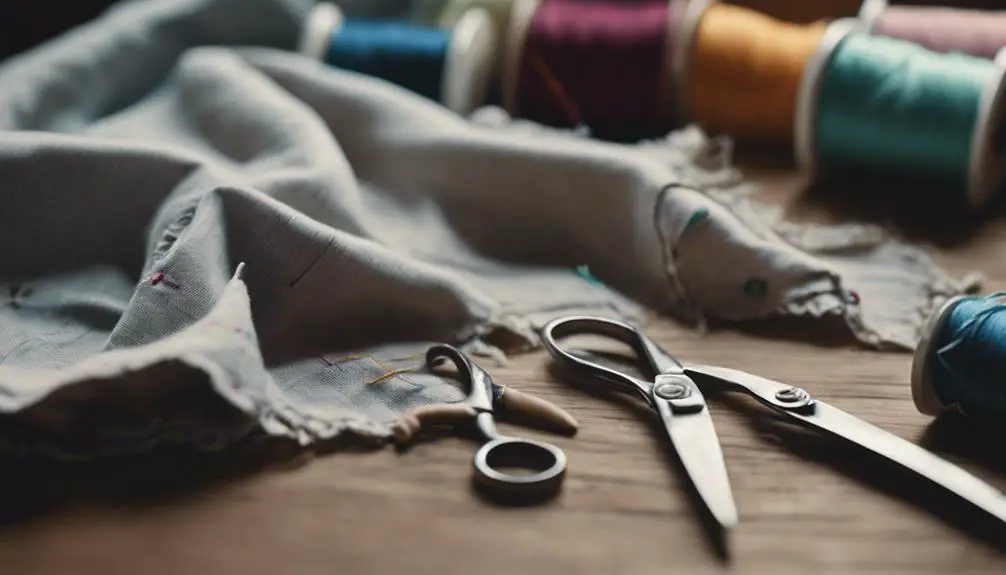
Assessing the Damage
To assess the damage on your shirt, closely inspect the frayed edges and gauge the severity of the issue.
Begin by determining whether the fraying is minor or if the fabric is greatly unraveling. Identify the type of fabric; woven fabrics typically fray more easily than knits, which can influence your approach to repairs.
Next, consider the location of the fray. Edges of seams or hems are more prone to fraying under stress compared to other areas of the shirt. This detail is essential for understanding how to proceed.
Measure the length of the frayed area as well; this will help you decide if trimming is necessary or if additional reinforcement is needed to achieve a clean finish.
No-Sew Solutions

While you may think sewing is the only solution for frayed edges, several effective no-sew methods can restore your shirt's appearance quickly and easily. One option is to use fabric glue. Simply apply small dabs along the frayed edges and fold the fabric over to create a hem. This method effectively stops further fraying without the need for a needle and thread.
Another quick fix is using clear nail polish. Apply a thin layer directly to the frayed area; this seals the fibers and prevents them from unraveling.
For fabrics that are tricky to handle, Scotch tape offers a temporary solution. Place the tape along the frayed edges for a clean look.
If you're looking for a more permanent approach, consider using pinking shears. These special scissors cut fabric with a zigzag edge, which helps prevent fraying over time.
Hand-Stitching Techniques
If you're looking for a reliable method to fix frayed edges on your shirt, hand-stitching offers a durable solution. Start by cutting a length of thread approximately 18 inches (46 cm) long, then tie a knot at one end to secure your stitching.
To thread the needle easily, create a loop with the thread and pull it through the needle's eye, guaranteeing you have a firm grip for stitching.
Utilize the whipstitch technique for effective reinforcement. Insert the needle from the back to the front of the fabric, keeping your stitches close to the frayed edge. This approach not only strengthens the area but also prevents further fraying.
Adjust the spacing between stitches based on the desired tightness; tighter stitches provide better protection against additional fraying.
Once you've completed the stitching, secure the thread with several knots. This step is essential, as it prevents unraveling and guarantees the durability of your repair.
With these hand-stitching techniques, you can effectively restore your shirt and enjoy its longevity. Remember, with just a needle and thread, you can tackle frayed edges with ease.
Using a Sewing Machine
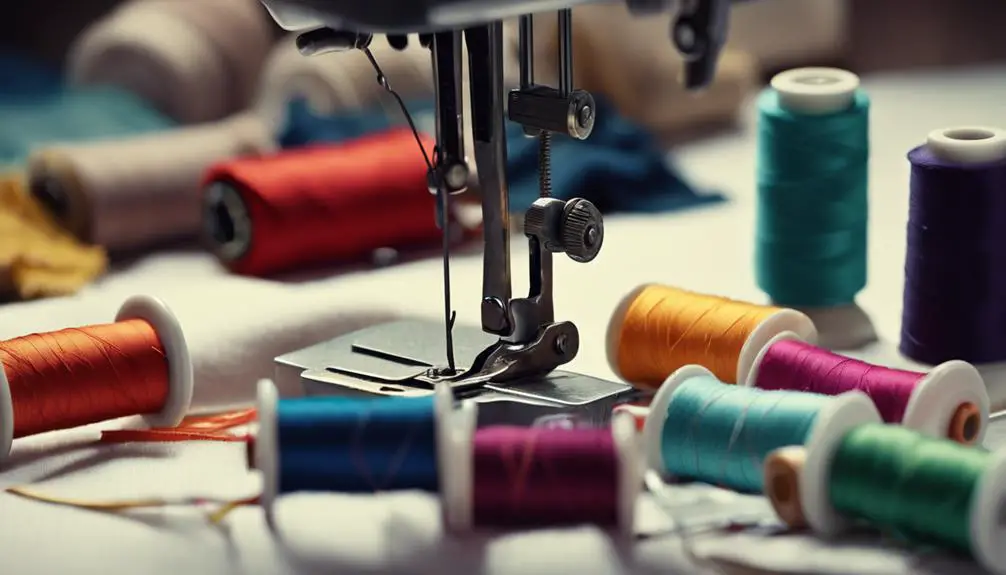
Using a sewing machine can markedly streamline the process of fixing frayed edges on your shirt, as it provides a quick and efficient way to secure the fabric.
Start by setting your sewing machine to a zigzag stitch. This stitch not only secures the fabric but also prevents further fraying. If you have an overlock foot, use it to achieve a professional finish while trimming the raw edge, mimicking the function of a serger.
Adjust the stitch width and length based on the fabric type. Wider stitches work best for looser weaves, while narrower stitches are ideal for tighter fabrics. Before you begin stitching, always backstitch at the beginning and end of your seam to secure the threads. This step helps prevent unraveling at the edges, ensuring durability in your repair.
For added strength, consider placing a lightweight fusible interfacing on the back of the frayed area before you start sewing. This extra layer reinforces the fabric, providing more stability during the repair process.
With these techniques, your sewing machine can effectively restore your shirt's edges to a tidy finish.
Reinforcing With Interfacing
When addressing frayed edges on your shirt, reinforcing the area with fusible interfacing can considerably enhance durability and prevent further damage. Fusible interfacing is a lightweight material that you can apply to the back of a frayed edge, providing essential support.
Start by cutting a piece of interfacing slightly larger than the frayed area. Make sure you use pinking shears to trim the edges of the interfacing; this helps prevent any additional fraying.
Next, place the interfacing adhesive side down against the fabric. Using a hot iron, press down firmly for a few seconds to bond the interfacing securely to the shirt. Choose a lightweight interfacing to maintain the fabric's drape, making certain your shirt keeps its original feel.
It's important to regularly inspect the areas where you've applied interfacing. This helps verify that it remains adhered and continues to provide support against fraying.
If you notice any lifting or wear, you might need to reapply or replace the interfacing to keep your shirt looking its best. By reinforcing with interfacing, you're taking proactive steps to prolong the life of your favorite garments.
Preventative Measures

To effectively prevent fraying on your shirt edges, consider implementing several proactive techniques during the sewing process. First, using a serger or overlock machine is one of the best preventative measures. These machines cut and finish seams simultaneously, providing a clean edge that greatly reduces fraying.
Before you begin construction, pre-wash your fabrics to eliminate excess tension in the fibers, resulting in a more stable final product. Another useful method is applying fusible interfacing to the raw edges, which reinforces the fabric and strengthens the seams.
During sewing, utilize zigzag or overlock stitches on raw edges. These stitches create a barrier against fraying by effectively sealing the threads.
Additionally, regularly inspect your seams, especially in high-stress areas. Catching early signs of fraying allows you to apply preventative measures promptly, saving you time and effort in the long run.
You can find various supplies, including interfacing and sergers, at your local craft store, making it easy to set yourself up for success.
Maintenance Tips
Maintaining your shirts is essential to prevent frayed edges and extend their lifespan. Regularly inspect the edges of the fabric for signs of fraying and address any issues immediately. By doing this, you can prevent further damage that may occur over time.
Store your shirts in a cool, dry place away from direct sunlight. This minimizes fabric degradation and helps maintain the integrity of the edges of the fabric. Consider using breathable garment bags for added protection against pests and environmental factors.
Before wearing new shirts, pre-wash them to reduce the risk of fraying caused by shrinkage after the first wash. Additionally, maintain a consistent washing routine using gentle cycles and mesh laundry bags for delicate fabrics. This will help preserve the edges of the fabric and prevent fraying.
Here's a quick reference table summarizing these maintenance tips:
| Tip | Action | Purpose |
|---|---|---|
| Inspect | Check edges regularly | Identify early signs of fraying |
| Store | Use breathable bags | Protect against pests and degradation |
| Wash | Use gentle cycles and mesh bags | Preserve fabric integrity and prevent fraying |
Choosing the Right Thread
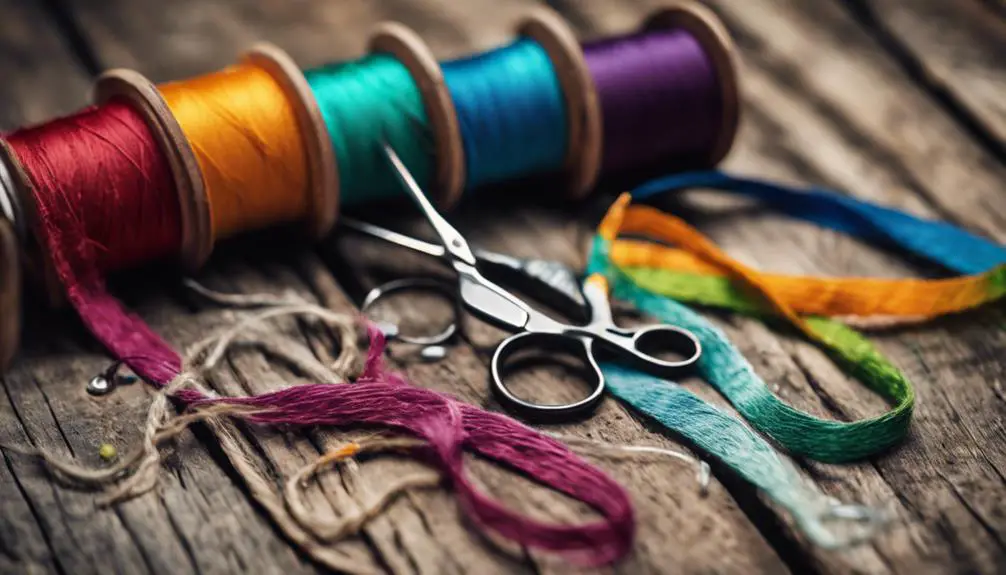
After confirming your shirts are well-maintained, selecting the right thread for repairs is the next critical step in fixing frayed edges. When choosing the right thread, opt for polyester or a cotton-polyester blend. These materials provide the durability and resilience needed to withstand further fraying.
It's essential to match the thread color to your fabric as closely as possible, guaranteeing that the repair is discreet and blends seamlessly with your garment. Additionally, select a thread weight that corresponds to the fabric weight; use finer threads for lightweight fabrics and thicker threads for heavier ones to maintain adequate support.
For areas that experience significant wear and tear, consider using a matching topstitching thread to enhance strength along the frayed edge. This extra reinforcement can help prolong the life of your shirt.
Before you start the actual repair, always test the chosen thread on a scrap piece of the same fabric. This way, you can assess compatibility and confirm your repair yields the desired results.
Community Resources
Finding community resources is a valuable way to enhance your skills in repairing frayed edges on shirts. Engaging with others who share your passion can provide essential insights and techniques. Here's a table that outlines various resources you can tap into:
| Resource Type | Description | Benefits |
|---|---|---|
| Online Forums | Join quilting and sewing forums to share tips. | Connect with enthusiasts for advice. |
| Local Sewing Groups | Participate in workshops for hands-on learning. | Learn edge finishing techniques directly from experts. |
| Video Tutorials | Access YouTube for step-by-step repair methods. | Visual guidance on serging and hand-stitching. |
| Social Media | Follow sewing influencers on Instagram and Pinterest. | Discover creative solutions and trends. |
Frequently Asked Questions
How to Get Rid of Frayed Edges on Clothes?
To get rid of frayed edges on clothes, you can use pinking shears, apply clear nail polish, or use fabric glue. Regularly inspect and reinforce seams to maintain fabric integrity and prevent further fraying.
How to Fix a Fraying Shirt?
To fix a fraying shirt, you should trim the edges, apply fabric glue for a no-sew option, or use a sewing machine for a reinforced stitch. Regular inspections help maintain the fabric's integrity.
Can Frayed Fabric Be Repaired?
Yes, you can repair frayed fabric using techniques like hand-stitching, applying fusible interfacing, or using fabric glue. If necessary, consider cutting back to a clean edge and re-hemming for a polished appearance.
How to Keep Fabric Edges From Fraying Without Sewing?
To prevent fabric edges from fraying without sewing, you can apply Scotch tape, use fabric glue, or seal edges with clear nail polish. Pinking shears also create jagged edges that reduce fraying effectively.


Can you be more specific about the content of your article? After reading it, I still have some doubts. Hope you can help me. https://www.binance.com/bn/register?ref=UM6SMJM3
??????????? Telegram ????? 1win Casin?. ?????o ? ?????? ?? 1???. ????????, ?????????? ??????? ???????????? ????? 1 win. ????????????? ? ??? ???, ??????? ???? ? ???? ???, ??????? ????? ????????? ???????? ? ??????? ?????? ?? ???????? ??????.
https://t.me/s/Official_1win_kanal/481
https://t.me/s/Official_1win_kanal?before=446
I don’t think the title of your article matches the content lol. Just kidding, mainly because I had some doubts after reading the article.
Your point of view caught my eye and was very interesting. Thanks. I have a question for you.
Hey there! I’ve been reading your web site for some
time now and finally got the bravery to go ahead and give you a shout out from New
Caney Tx! Just wanted to mention keep up the fantasatic job!
Thanks veryy interesting blog!
Hey There. I found your weblog the usage of msn. This is an extrekely well written article.
I will be sure to bookmark it and return to read more of your helpful info.
Thank you for the post. I’ll certainly return.
What are some places in our society that serve the
same functions that the forum did in rome?
Landau destacó que el comentario de Trump estaba dirigido a la habilidad de
Biden en sus interacciones con líderes como Putin y Xi Jinping.
USA Network is a popular American channel that has more than 90 million viewers.
This channel is used by millions of people on their TVs.
The best thing about USA Network is that you
can stream it from any device such as Roku, Apple TV, Android TV, firestick, and
others. So it is basically the USA Network cable channel which is
accessible on a variety of different digital media players.
For instance, If you have a Roku device or any other device
we will help you with the steps to activate it.
Whether you are in the United States, South America, or Canada,
you can follow the steps below to activate USA Networks on Roku
at usanetwork/activatenbcu. After activating, you can watch your preferred shows
in either entertainment or sports in various languages
like English as well as Spanish.
https://www.usanetwork-nbcu.com/
Selain memberikan fasilitas gratis untuk mengunduh video,
kamu juga bisa memilih format lain, yaitu MP4 dan MP3.
?????? ???????????? ???????? ???????? KRAKEN?
??????????? KRAKEN ???????? ???????
?????????????? ?????????
????????? ????????? ???????? ????????.
??-??????, ??? ??????? ? ????????????? ???????????,
?????????????? ??????? ?????????.
??-??????, ?????????? ???????? ????????? KRAKEN, ??????? ???????? ?????????,
????? ??????? ? ?????????? ???????? ???? ??? ????? ?????????????.
?-???????, ??????????? ??????? ??????????
??????????, ?????????? ????????? ?????????? ?????? (????????) ? ??????????? ????????????? ?????????
?????????????, ??? ???????????? ????? ??? ????? ?????? ??????.
?? KRAKEN ???????????????? ?????????? ? ???????????? ?????????? ?
???????????? ????????, ??? ?????? ??????? ??????? ????? ?????????????,
?????????? ?, ??? ?????????, ??????????
????? ?????????????, ??????? ??????????? ? ??????????.
https://blogolize.com/posts
Roof Inspection Los Angeles
I know this if off topic but I’m looking into starting
my own weblog and was curious what all is needed to get set up?
I’m assuming having a blog like yours would cost a pretty penny?
I’m not very web smart so I’m not 100% sure. Any tips or advice would be
greatly appreciated. Many thanks
Quite often, we notice ourselves at the junction in everyday life.
One side might be a tougher journey which can be a little bit more enjoyable, whereas an alternate may just be the path of least resistance, or perhaps a second path.
Any course you wind up taking will likely decide lots of things about your long
term success. Kids massage therapy is the way that I end up spending nearly
all of my days, and it’s also truly rewarding. But, I could nearly as
simply have selected something different, for instance, life
as a librarian or maybe as an under the sea biologist.
We can’t have a clue how substituting just one minor element
would likely correct just about every part of our existence.
These are definitely some considerations think about.
Hello I am so glad I found your web site, I really
found you by mistake, while I was searching on Aol for
something else, Nonetheless I am here now and would just like to say thanks for a fantastic post and a
all round entertaining blog (I also love the theme/design), I don’t have time to browse it all at the moment but
I have bookmarked it and also added in your RSS feeds,
so when I have time I will be back to read much more, Please do keep up the superb b.
Thank you, I’ve recently been looking for information about this subject for ages and yours is the best I have found
out till now. But, what about the bottom line? Are you certain in regards to the supply?
Excellent read on SEO strategies. Your focus on Local SEO and ??????????? ???????? is refreshing,
since ??? ?????? ?????? ?? this ????
entirely. I’ll keep following your updates for more insights on content optimization and link building.
It does all that without the luxury price tag, proving glass-like
skin doesn’t have to cost a fortune.