Fixing your coat's lining when it pulls away is like giving your favorite jacket a revitalizing makeover, and it's easier than you think! First, grab a needle, matching thread, and some scissors. Unpick any tight stitches, trim frayed edges, and pin the lining back in place. Use a catchstitch to attach it securely, leaving a bit of slack to prevent future pulls. Don't skip the cool iron to smooth out those creases—you want it looking sharp! Regular checks can save you from bigger fixes, so why not keep that coat in top shape? Keep going to uncover more handy tricks!
Types of Damage
Coat linings often experience various types of damage, and it's important to catch these issues early. After all, you don't want your favorite coat falling apart on you, right? One common problem is when the lining fabric rips or comes apart at the seams. This usually happens in spots that see a lot of movement, like the shoulders or underarms. If you notice torn fabric, don't ignore it! That little tear could mean there's weakness in the lining, and if you let it slide, it might just get worse. Additionally, regular friction from movement or contact with other garments can exacerbate wear on the lining, leading to issues like pilling on knitwear.
You should also keep an eye on the seam allowance. Over time, those seams can fray, especially if you've had that coat for years. Fraying edges can quickly compromise the integrity of the entire lining. It's like a game of Jenga — pull one piece, and the whole thing could come tumbling down!
When you spot a problem, remember that seams are your friends. They're the easiest places to open up for repairs or even patch things back together. Just be sure to check all around the lining, since factory openings might be in unexpected spots. So, grab that coat and give it a good inspection! Trust me, catching these little issues now can save you a big headache later. Plus, it keeps your coat looking sharp and ready for anything!
Repair Techniques
When it comes to repairing your coat lining, taking a hands-on approach can make all the difference. You might think tackling this issue is overwhelming, but with some simple repair techniques, you can easily get that lining back in shape. First, grab a needle and thread that match your coat's fabric for a seamless finish. You're going to want to use hand sewing for small areas where the lining has pulled away. Additionally, understanding the importance of proper fabric care can help maintain the longevity of your coat, especially if it's vintage vintage clothing insights.
A whipstitch works wonders for closing up those little holes, providing a secure yet flexible repair. It's like giving your coat a cozy hug! Before you start, try using basting stitches to temporarily hold the lining in place. This way, you'll make sure everything is aligned perfectly, and you won't accidentally create a lopsided mess.
Once you've secured the lining, give it a little love with a cool iron to smooth out any creases. Trust me, it makes a world of difference and gives your repair that polished look. Now, don't forget to inspect your handiwork! Check the inside of the lining for any missed spots that might need additional stitching. After all, you want your coat to look as good as new, right? With these simple tips, you'll have your coat lining looking fabulous again in no time, proving that a little effort goes a long way!
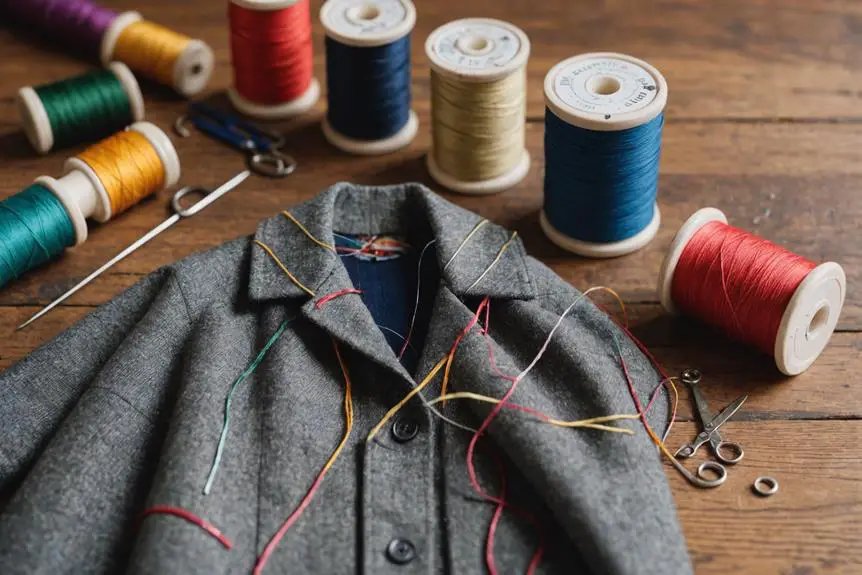
Tools and Materials
Having the right tools and materials is key to successfully fixing your coat lining. First off, you'll need a medium-sized hand sewing needle. This little guy is perfect for stitching the lining back in place, especially in those small, tight spots where the fabric might be a bit stubborn. You don't want to use a big needle and risk ruining your coat! For added strength and durability, consider using repairing torn pockets techniques that can be applied to your coat lining as well.
Next, grab a pair of scissors. These are essential for trimming any loose threads or frayed edges, helping you achieve that clean and polished look after your repair. Trust me, those little details matter!
You'll also want some straight pins. These handy tools are great for holding the fabric securely while you sew, making sure everything stays in line. No one likes a crooked seam, right?
And don't forget about matching thread! It's super important to choose a color that matches your coat's fabric. This way, your repair will blend in seamlessly, and no one will even notice you made a fix.
If you're feeling fancy, a sewing machine can speed things up. But let's be real, hand sewing can be therapeutic too! Finally, keep a seam ripper handy just in case. If you make a mistake, it'll help you undo those stitches without damaging your fabric.
Step-by-Step Repair Process
Now that you've gathered your tools and materials, it's time to tackle the repair process. First, you'll want to identify the damage and carefully unpick any tight stitches. This will relieve tension on the lining, making it easier to work with. Next, grab those pinking shears and trim any frayed or raw edges. A clean surface is vital for a successful fix!
Once you've done that, pin the lining back into place. Be sure to leave enough slack—this'll help prevent future pulling. After that, baste the lining to hold it securely. You're almost there! Now, use a catchstitch to attach the hem. This stitch is flexible, so it's perfect for lining.
To wrap it up, press the lining with a cool iron to smooth out any creases. Don't forget to remove those basting stitches for a neat finish. Your coat will look good as new!
Here's a quick reference table to help you along the way:
| Step | Action | Purpose |
|---|---|---|
| 1. Identify Damage | Unpick tight stitches | Relieve tension on lining |
| 2. Trim Edges | Use pinking shears | Create a clean surface |
| 3. Pin Lining | Secure it in place | Prevent future pulling |
| 4. Baste & Catchstitch | Hold and attach securely | Guarantee flexibility in repair |
With these simple guidelines, you can confidently fix your coat's lining! Happy repairing!
Maintenance and Care Tips
To keep your coat lining in great shape, it's essential to regularly inspect it for any signs of wear, like detachment or holes. You don't want a surprise rip when you're trying to look sharp! A quick check can save you from bigger repair headaches later on. Additionally, understanding the type of fabric and embroidery on your coat can help you identify the best methods for care and maintenance, including general washing advice.
When it comes to storage, hang your coat in a cool, dry place. You wouldn't want it to feel cramped, right? Using padded hangers can help maintain its shape and prevent unnecessary strain on both the lining and outer fabric. Ever thought about a garment bag? It's a fantastic way to keep dust and other pesky elements at bay.
Now, washing is another important area for care. Always follow those care labels! They're there for a reason. Use gentle cycles and the right detergents to keep your coat looking fresh without damaging the lining.
If you spot any damage, don't wait! Promptly repair it. Those little issues can turn into big ones if left unattended. You'll thank yourself later for taking action early.
Frequently Asked Questions
How to Repair a Coat Lining?
To repair a coat lining, inspect for damage, match lining materials, and use sewing techniques like catchstitching. Regular coat maintenance and proper fabric care can prevent future issues and extend your garment's lifespan.
Can the Lining of a Coat Be Replaced?
Yes, you can replace your coat's lining with suitable lining materials. Choose fabrics that match your coat styles, and use proper sewing techniques for a secure fit. Don't forget to follow fabric care instructions to maintain longevity.
How Do You Add Lining to an Existing Coat?
To add lining to your coat, choose suitable lining materials that match your coat style. Use sewing techniques like straight stitching and catchstitching, and remember to follow fabric care instructions for longevity and appearance.
How to Fix a Tear in the Lining?
You can fix a tear in the lining by selecting appropriate lining materials, using a suitable needle type, and employing effective stitching techniques. Additionally, fabric adhesives can reinforce repairs for a lasting solution.


Your point of view caught my eye and was very interesting. Thanks. I have a question for you.
Thanks for sharing. I read many of your blog posts, cool, your blog is very good.