
To tailor a vintage suede vest, start by creating a template using a well-fitting vest you own. Mark your cutting lines with chalk and carefully cut your faux suede for clean edges. Assemble your vest by pinning the pieces together, then sew the sides and shoulders using a heavy-duty machine or hand stitch. Modify the fit by trimming about an inch from each side and enlarging armholes as needed. Finish by adding unique fringe details, ensuring a polished appearance. Each adjustment adds your unique style, and there's so much more you can explore to make it truly yours.
Materials and Tools Needed
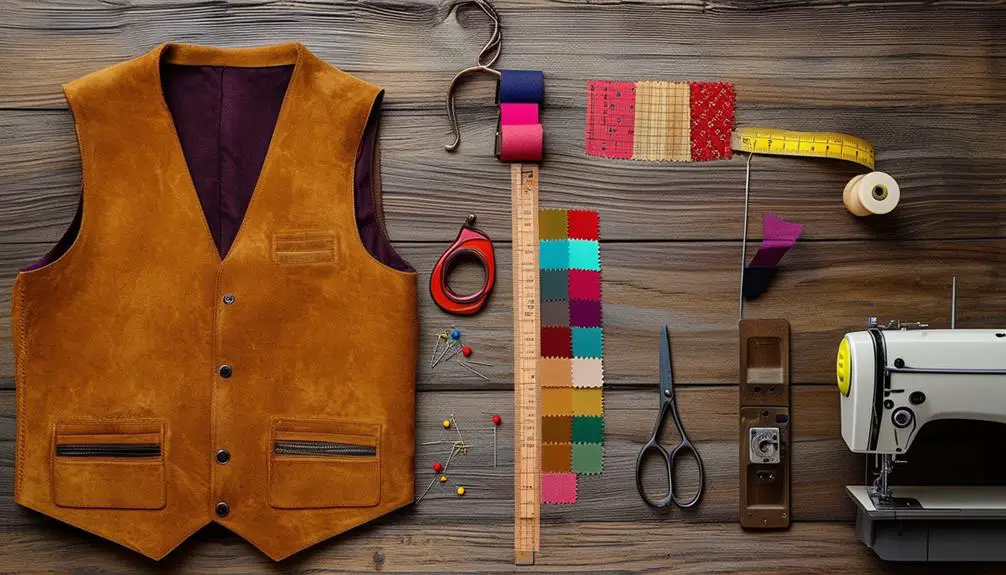
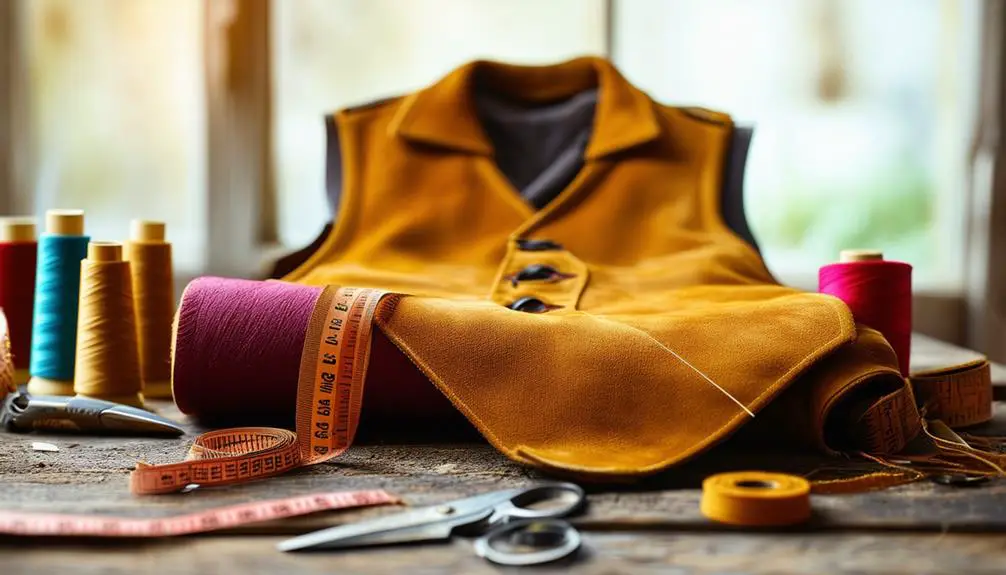
When you're ready to tailor your vintage suede vest, gathering the right materials and tools is vital for a successful project. Start by acquiring approximately 3/4 meter of faux suede fabric, costing around $10-$15. This fabric will serve as the foundation for your vest, so choose a color and texture that speaks to you.
Consider the historical context of vintage styles to guarantee the design reflects the unique characteristics of the era you're inspired by, such as vintage clothing trends.
You'll need several important tools to make the process smoother. Invest in heavy-duty scissors or a rotary cutter to guarantee clean cuts through the thick fabric. Don't forget matching thread and specialized needles designed for working with suede—these will help you achieve a professional finish.
A cutting board will protect your surfaces and offer a stable workspace. Chalk is vital for marking your fabric, allowing you to trace your template accurately. Use an existing looser vest as your guide, making sure to account for any excess fabric you plan to trim or adjust.
Cutting the Faux Suede
Cutting faux suede requires precision and a steady hand, transforming your carefully chosen fabric into the foundation of your tailored vest.
Years ago, you might've settled for a simple Suede Jacket, but now you're looking forward to crafting something uniquely yours.
Identifying Vintage Betty Barclay can provide inspiration for stylish design elements you might incorporate.
Here's how to get started:
- Obtain your material: Grab approximately 3/4 meter of faux suede, usually priced between $10-$15, guaranteeing you have enough for your vest.
- Create a template: Use an existing vest that fits well to trace the back and front panels. Don't forget to freehand the neckline for a personalized touch.
- Cut for fringe: Extend the front panels to the vest's bottom for fringe creation, then use a rotary cutter with a straight edge to maintain consistent width.
- Ensure symmetry: Flip the front panel to trace and create a matching piece. This step ensures both sides of your vest align perfectly.
Utilize chalk to mark cutting lines clearly, and secure fabric pieces with pins.
This meticulous approach will help you achieve a professional look as you move forward with your vintage vest project.
Preparing the Fabric Panels
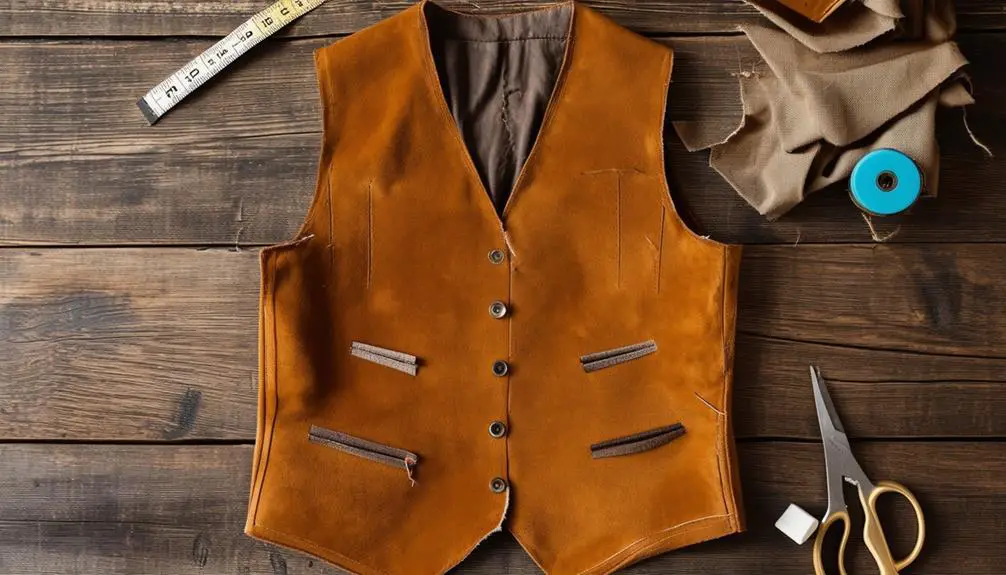
As you prepare the fabric panels for your vintage suede vest, it's essential to verify that each piece reflects the design you envision. Start by tracing the existing vest onto your faux suede fabric. Confirm you create a back panel and two front panels that mirror the original shape, which sets a solid foundation for your project.
Next, grab some chalk to mark the neckline design on the front panels. This step allows for a personalized touch that truly reflects your style. Don't forget to extend the front panels to your desired length, keeping in mind any fringe you plan to add later.
When it comes to cutting fringe, use a rotary cutter paired with a straight edge. This technique guarantees consistent widths, giving your vest a polished finish.
After cutting, remember to mirror the front panel by flipping it over and tracing onto the fabric. This confirms both sides are symmetrical, vital for a well-tailored look.
With your fabric panels prepared, you're well on your way to creating a stunning vintage suede vest that's uniquely yours.
Assembling the Vest
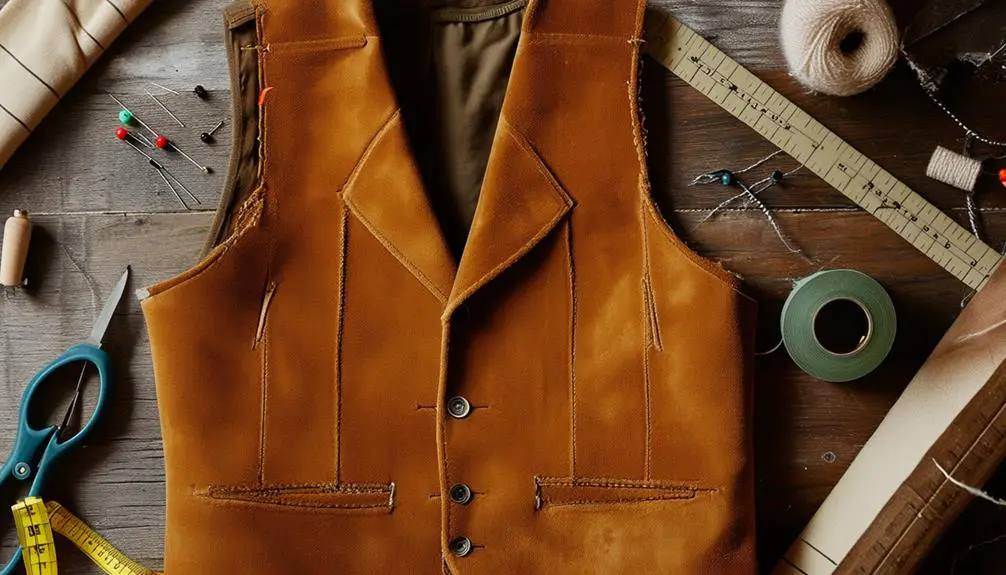
With your fabric panels meticulously prepared, it's time to bring your vintage suede vest to life. Start by pinning the fabric pieces together, guaranteeing the good sides face each other. This step is essential for accurate alignment, setting the stage for a clean finish.
If you don't have a sewing machine, don't worry! Hand stitching the shoulder and side seams will provide a sturdy hold for your vest's structure.
Here's a quick checklist to guide you:
- Pin fabric pieces securely.
- Use hand stitching for seams if needed.
- Adjust armholes by approximately one inch for comfort.
- Trim excess fabric from the seams for a polished look.
Once you've assembled the vest, take a moment to trim any excess fabric from the seams. This will enhance the polished appearance of your suede.
If you initially overlooked the back panel fringe, now's the time to create it using extra fabric. This addition will guarantee your vest remains cohesive and visually appealing.
With these steps, you're well on your way to crafting a stunning vintage suede vest that showcases your unique style!
Modifying for a Better Fit
To achieve a tailored fit for your vintage suede vest, start by carefully examining its structure and pinpointing areas that need adjustment. Focus on the sides and armholes, as these are essential for a comfortable fit.
Grab a heavy-duty sewing machine and specialized leather needles; regular machines might struggle with the thickness of suede.
When taking in the sides, aim to reduce about one inch on each side. This creates a snug fit while maintaining the vest's original design integrity. Be mindful not to overtake in, as you want the vest to still drape nicely on your body.
For the armholes, you'll want to enlarge them by roughly one inch. This adjustment prevents any restriction of movement, making sure you can wear the vest comfortably all day.
After making these alterations, always try on the vest. Check how it feels and moves with your body. If it's still not quite right, don't hesitate to make additional adjustments.
Tailoring is all about finding that perfect balance between style and comfort, so take your time to achieve the best fit possible.
Creating Fringe Details
Adding fringe details to your vintage suede vest can transform it into a standout piece that reflects your unique style. Fringe adds movement and texture, making your vest pop.
Here's how to create those eye-catching details:
- Gather materials: You'll need approximately 3/4 meter of faux suede fabric and a rotary cutter for precise cutting.
- Cut uniform strips: Use a straight edge to cut fringe strips of consistent width. This guarantees a polished look, and you may want to extend the front panels to accommodate the fringe.
- Attach the fringe: Apply fabric glue to secure the fringe pieces on the inside of the back panel. This creates a hidden hemline for a clean finish, keeping your vest looking sharp.
- Trim for perfection: After applying the fringe, trim all edges to guarantee even lengths. This final touch enhances your vest's aesthetic and gives it a tidy appearance.
Final Stitching Techniques
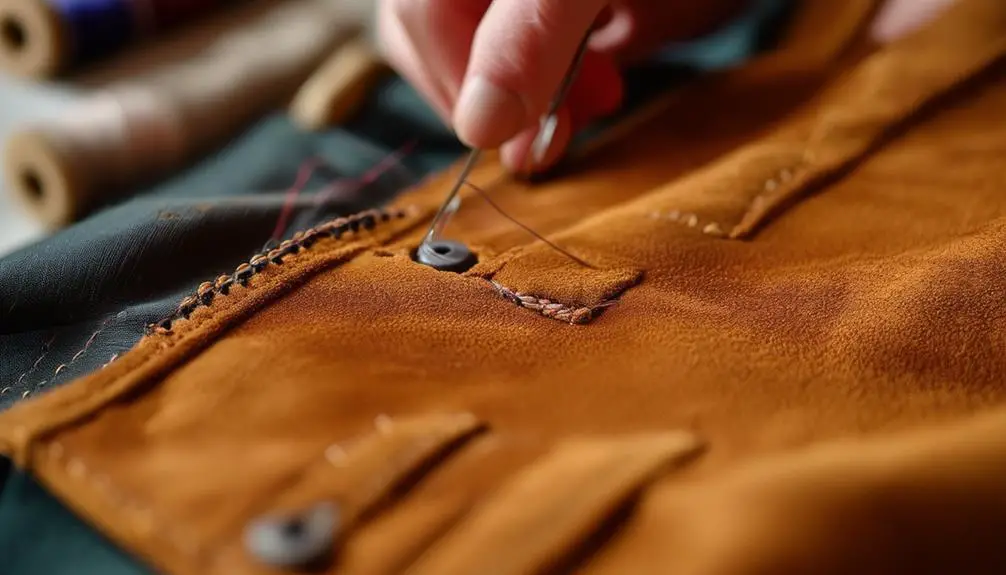
Final stitching techniques are essential for ensuring your vintage suede vest not only looks great but also stands the test of time. Before you begin, take a moment to align all seams properly; this alignment is vital for maintaining the vest's shape and preventing unsightly puckering in the suede fabric.
When you're ready to stitch, grab a heavy-duty sewing machine equipped with a leather needle. This setup can handle the thickness of the suede without risking needle breakage. Depending on the stretch of your suede, decide between using a straight stitch or a zigzag stitch. Make sure to choose a thread that matches the texture and color of the fabric for a seamless finish.
Don't forget to reinforce stress points—like armholes and side seams—by backstitching. This extra step enhances durability, ensuring your vest will withstand wear and tear.
After you've finished stitching, carefully trim any excess fabric. Finally, use a suede brush to restore the nap and texture of the fabric, giving your vest a polished, professional appearance.
With these final stitching techniques, you'll have a stunning, long-lasting vintage suede vest ready to wear.
Ensuring a Neat Finish
Achieving a neat finish when tailoring your vintage suede vest is essential for a polished look. A few key techniques can elevate your craftsmanship and guarantee your vest looks professionally made. Here's what you should focus on:
- Use a rotary cutter and straight edge: This helps create clean cuts for any fringe, maintaining consistent width throughout.
- Opt for hand stitching: If you can't use a sewing machine, hand stitching shoulder and side seams allows for better control and minimizes the risk of damaging the suede.
- Trim excess fabric from seams: After assembly, clean up the edges to enhance the vest's appearance and align with its original design.
- Apply fringe with fabric glue: Secure pieces on the inside of the back panel for a hidden hemline, avoiding visible stitching while preserving the vest's aesthetic.
As you tailor your vest, remember to regularly check the fit. Adjust as needed to guarantee comfort and style while keeping a cohesive design throughout.
These steps won't only refine your vest but also boost your confidence in wearing it.
Fashioning Your Unique Style
Often, a vintage suede vest becomes more than just a garment; it transforms into a canvas for personal expression. You can elevate its style by adding unique fringe details, which not only enhance its aesthetic but also showcase your creativity.
Picture yourself at a summer festival, pairing your vest with shorts or a flowing skirt, effortlessly blending comfort and trendy flair.
Tailoring adjustments are essential for achieving a perfect fit while preserving the vest's vintage charm. Consider enlarging the armholes or modifying the neckline to guarantee you feel great wearing it.
If you're looking for cost-effective ways to customize, faux suede fabric is an excellent alternative. At around $10-$15 for 3/4 meter, it allows you to explore your individual tastes without breaking the bank.
As you craft your unique style, remember that sharing your tailored creations can inspire others. Engage with fellow fashion enthusiasts on social media by using specific hashtags, creating a community that values creativity and innovation.
Embrace this process, and let your vintage suede vest reflect your personality and flair, making it a standout piece in your wardrobe.
Sharing Your Creation
Once you've tailored your vintage suede vest to perfection, it's time to share your creation with the world. This is your chance to inspire others and connect with fellow DIY enthusiasts. By showcasing your work, you can also highlight the importance of vintage clothing labels and their history, which can add depth to your project and attract attention from collectors vintage tag insights.
Here are a few ways to showcase your work:
- Social Media: Post your vest on platforms like Instagram or Pinterest using hashtags like #diy4. This helps you reach a broader audience and find a community of crafters who share your passion.
- Before-and-After Photos: Document your tailoring journey with striking before-and-after shots. This not only highlights your skills but also encourages others to begin similar projects.
- Online Forums: Engage in forums or groups dedicated to fashion and tailoring. Sharing your vest can lead to valuable feedback and tips from experienced members.
- Workshops or Blog Posts: Consider holding a small gathering to demonstrate your techniques or create a blog post detailing your process. Sharing your challenges and successes can motivate others to try their hand at tailoring vintage pieces too.
Frequently Asked Questions
Can Suede Be Tailored?
Yes, suede can be tailored, but it requires specialized skills and tools. You'll need heavy-duty sewing machines and experienced tailors to guarantee a perfect fit without damaging this unique fabric's texture and durability.
How Do You Care for Vintage Suede?
To care for vintage suede, brush it regularly with a soft-bristle brush, use a suede eraser for stains, spot clean spills promptly, and store it properly to keep it looking beautiful for years.
How Do You Bring a Suede Jacket Back to Life?
To revive your suede jacket, start by gently brushing it to remove dirt, then treat stains with a suede eraser. Finish by applying a protector spray and conditioning regularly to maintain its softness and shape.
How to Stop Suede From Shedding?
To stop suede from shedding, regularly brush it with a specialized suede brush, apply a protective spray, and store it away from heat and sunlight. Handle it gently to maintain its integrity and minimize shedding issues.


Thanks for sharing. I read many of your blog posts, cool, your blog is very good.
Thanks for sharing. I read many of your blog posts, cool, your blog is very good.
Your point of view caught my eye and was very interesting. Thanks. I have a question for you. https://www.binance.info/pl/register-person?ref=YY80CKRN
Thank you for your sharing. I am worried that I lack creative ideas. It is your article that makes me full of hope. Thank you. But, I have a question, can you help me?